Ultimate Halftone Effect in Photoshop

Ultimate Halftone Effect in Photoshop

Halftone effects can transform ordinary photos into striking graphic designs, but many designers struggle with creating patterns that blend naturally with their images. The traditional approach often results in rigid, uniform dots that don't adapt to the underlying image tones and details.

This tutorial demonstrates how to create flexible halftone effects using multiple pattern types and blending techniques. You'll learn to build reusable workflows that can be applied to any image instantly, plus advanced methods for combining patterns and adding textures for more dynamic results.

Watch the Tutorial

Any links or downloads mentioned by the creator are available only on YouTube

Understanding Halftone Pattern Behavior

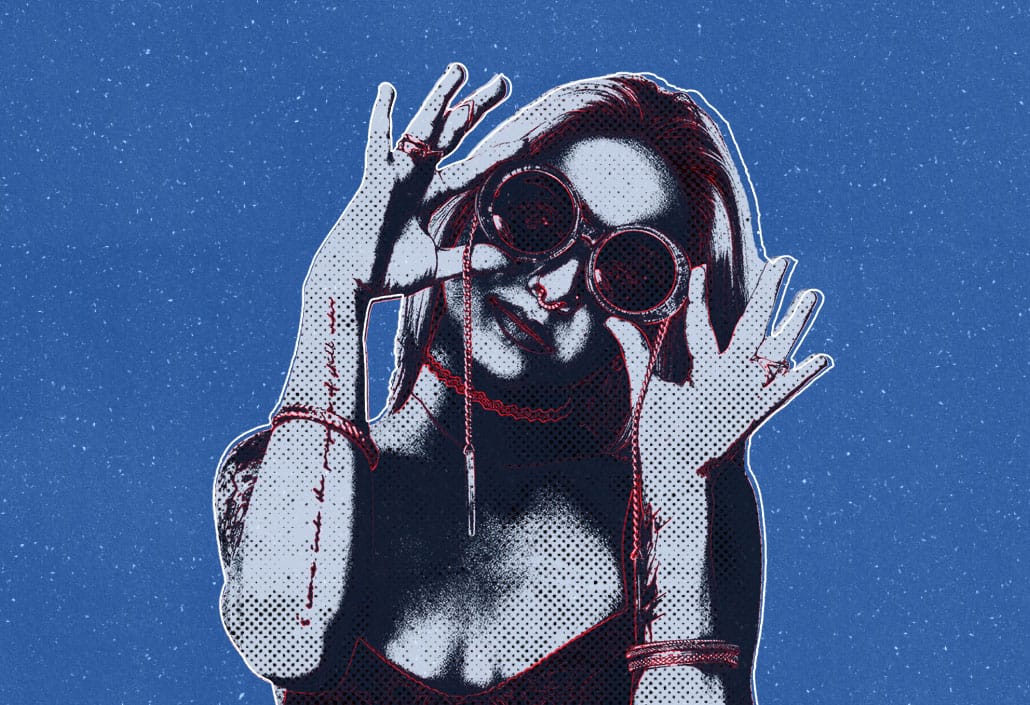
Halftone effects work by varying dot sizes based on image brightness values, mimicking traditional print reproduction techniques. The key to natural-looking results lies in how the pattern interacts with the underlying image through blending modes and blur effects.

When using Color Burn blending mode with halftone patterns, the dots need to be slightly blurred to respond dynamically to image tones. Sharp patterns maintain uniform dot sizes regardless of the underlying brightness, while blurred patterns expand in dark areas and contract in light areas, creating the authentic halftone appearance.

This principle applies whether you're working with traditional dot patterns, lines, circles, or custom shapes. The blur radius typically ranges from 2-4 pixels for most image resolutions, though this can be adjusted based on the desired effect intensity.

Essential Halftone Workflow Techniques

  • Convert pattern layers to Smart Objects before applying filters to maintain non-destructive editing capabilities and allow easy adjustments later.
  • Use Levels adjustment layers to control halftone distribution across highlights, midtones, and shadows. The black and white sliders reveal patterns in previously solid areas.
  • Apply subtle Gaussian blur to your base image layer to prevent fine details like hair from creating unwanted interactions with the pattern overlay.
  • Create pattern-based workflows instead of filter-based ones for better control over scale, rotation, and reusability across multiple projects.
  • Save merged result layers using Alt + Shift + E when experimenting with different patterns to preserve previous versions without losing work.

Explore More Creative Effects

These related tutorials cover additional techniques for enhancing your photo manipulation skills.

Create Authentic Vintage Halftone Effects with Custom Patterns in Photoshop
Photoshop’s built-in Color Halftone filter creates rigid, geometric results that lack the authentic character of vintage print work. The filter also fails to produce true CMYK separations in RGB documents, missing the black channel entirely and creating an unconvincing simulation of traditional printing methods. This technique uses custom patterns and
Create an old-school halftone photo effect in Photoshop – Photoshop Roadmap
Creating authentic vintage halftone effects can be challenging when working with modern digital photography. Many designers struggle to achieve that classic print aesthetic without the result looking artificial or overdone. This tutorial demonstrates a multi-layer approach to building realistic halftone vintage effects using threshold adjustments, pattern overlays, and selective masking.
Create awesome retro halftone effects in Photoshop
In this tutorial, I’ll run through the setup I use to create halftone effects in Photoshop. Great for posters, apparel, stickers, or just making cool retro-lookin stuff! This approach will bypass the halftone filters and create the effect from scratch, with the added benefit of being live and adjustable. In the second half of the […] More

Get tutorials & freebies delivered to you.

Subscribe to the Photoshop Roadmap newsletter, a weekly roundup of new tutorials, insights and quality downloads, trusted by 6500+ readers.

You might also like

How to Use Gemini 2.5 Nano Banana AI in Photoshop 2026

Photoshop 2026 introduces Gemini 2.5 Nano Banana, a powerful AI model that transforms how you edit images. This advanced tool maintains scene coherence while allowing dramatic changes to poses, backgrounds, and camera angles. The technology understands context and lighting, creating realistic results that feel naturally integrated into your original...

How to Access Adobe's Free Stock Photos in Photoshop and Create Photo Collages

Adobe now includes thousands of free stock photos directly in Photoshop, making it easier than ever to find professional images for your projects. These royalty-free images work perfectly for creating dynamic photo collages without leaving the application. This tutorial covers three different methods to access these free stock images and...

Adding Atmospheric Texture Layers in Photoshop for Moody Images

Victorian London emerges from fog-shrouded streets in classic Sherlock Holmes films, where every shadow tells a story and atmosphere becomes a character itself. The interplay of light, mist, and aged textures creates that unmistakable cinematic mood that draws viewers into another world. This video demonstrates how texture layers transform ordinary...

Master Layer Comps in Photoshop for Faster Design Workflow

Design iterations can quickly spiral into chaos without proper version control. Layer Comps in Photoshop offers a powerful solution that most designers overlook, letting you save snapshots of your layer panel's visibility, position, and appearance at different stages of your project. This hidden feature transforms how you approach...

How to Create a Can Mockup in Photoshop Using Smart Objects and Masks

Professional can mockups transform flat designs into realistic product presentations that clients can instantly visualize. This technique combines precise measurement, smart object workflow, and blending modes to wrap your graphics seamlessly around curved surfaces. The process creates reusable templates that automatically apply proper perspective and lighting effects to any design...

Cutting Out Complex AI Images Using Channel Masking in Photoshop

AI-generated images often contain intricate details that challenge standard background removal tools. When automatic selection methods fail to capture complex edges and fine details, manual techniques become essential. This technique demonstrates how to use channel masking to create precise selections that preserve every detail of your AI artwork. Watch the...

You’ve successfully subscribed to Photoshop Roadmap
Welcome back! You’ve successfully signed in.
Great! You’ve successfully signed up.
Success! Your email is updated.
Your link has expired
Success! Check your email for magic link to sign-in.