Did you know that you can apply one-click color effects to your photos? It is very easy to do using the Color Lookup Adjustment Layer. In fact, it’s so easy that even an absolute beginner can apply beautiful color effects just by following this short tutorial.
Final image

Without getting into too many technical details, a color look-up table (CLUT) is a mechanism used mainly in video or photography to transform a range of input colors into another range of colors. While difficult to create, the Color Lookup Tables are very easy to apply, and Adobe has provided a nice amount of pre-loaded tables for you to use on your photos.
Let's open our base image. You can download this one here. If you plan to use this image in commercial work, just be sure to read the usage rights on the download page. Photo by Joel Bedford via Flickr.
Base image

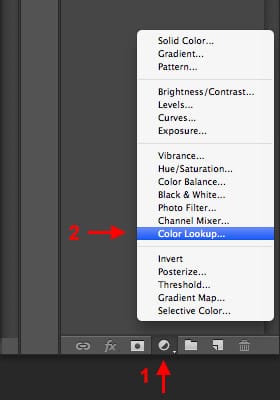
Click on the Adjustment Layers icon at the bottom right of the Layers palette and select Color Lookup from the menu.
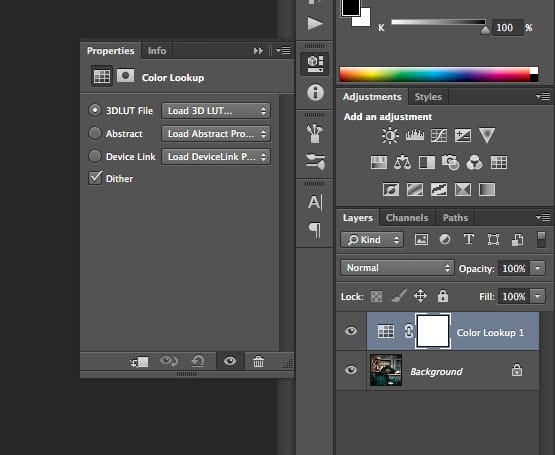
The Color Lookup Palette will open up and you will see several options. Don't worry about those options; we will only concentrate on the pre-built tables.
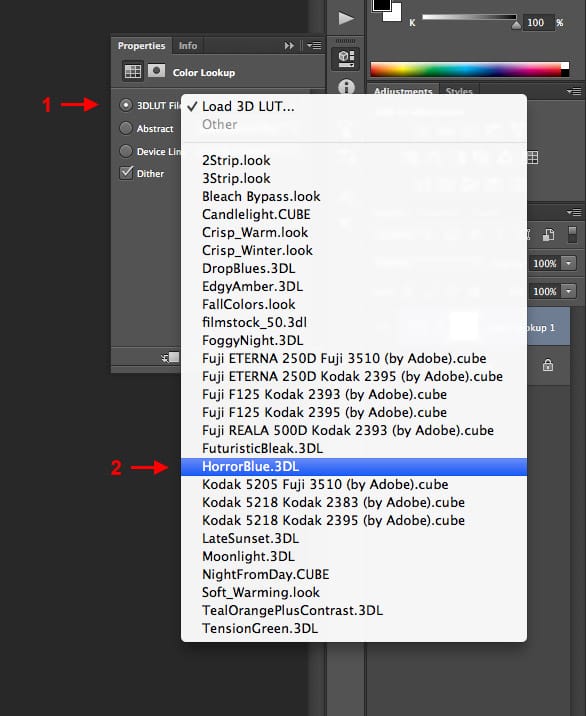
Just click on the pulldown menus and select the table you want. Always click on the pulldown menu and not on the radio buttons, or you will be prompted to load a table to your list. Since we will be using the default tables, this is not necessary.
In this example, we will start with one of my favorites, the Horror Blue table.
And that's it! With just a single click, we applied an awesome color effect without messing around with curves, levels, and other complex techniques.

Let’s see some other examples:
2 Strip Color Table

Candle Light Color Table

Film Stock 50 Color Table
