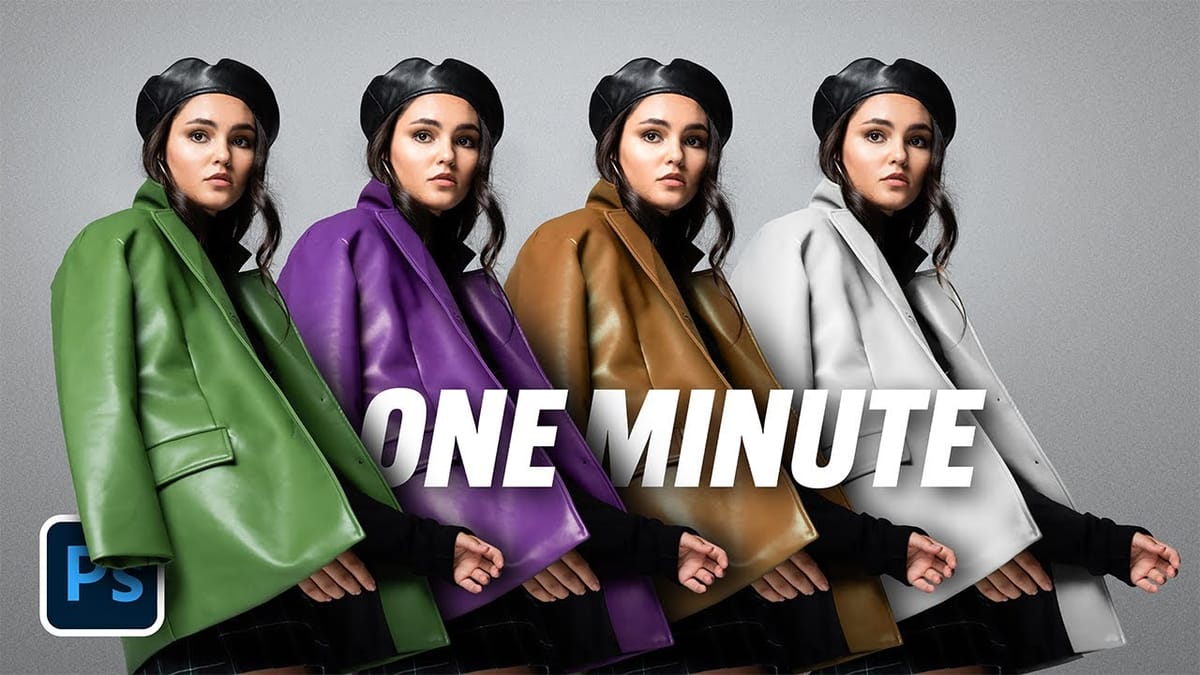
Working on the color palette of an image is a fundamental task in photo editing, enabling designers and photographers to evoke different moods, correct imbalances, or simply reimagine visual elements. While Photoshop has long offered robust tools for color manipulation, achieving precise and natural-looking changes often required a multi-step workflow and a deep understanding of complex adjustments.
This video introduces a groundbreaking new feature in Photoshop's beta version, designed to streamline and simplify the process of altering colors. Viewers will discover how the intuitive "Adjust Colors" tool, integrated directly into the contextual taskbar, allows for quick identification and modification of dominant hues, significantly enhancing efficiency in color-centric projects.
Watch the Video
Any links or downloads mentioned by the creator are available only on YouTube
Understanding Color Adjustment Workflows in Photoshop
For decades, Photoshop users have relied on the Hue/Saturation adjustment layer as a cornerstone for altering colors. This powerful tool operates on the HSL color model, which breaks down color into three distinct components, offering granular control. The new "Adjust Colors" feature builds upon this foundation, enhancing its accessibility and intelligence by automatically identifying key colors within an image.
Traditionally, isolating specific colors for adjustment involved manual selections or precise eyedropper use to define color ranges. While effective, this could be time-consuming. The updated functionality, particularly the "prominent colors" preset, represents a significant leap forward, allowing users to target the most visually significant hues with unprecedented speed. This intelligent detection often reduces the need for extensive manual refinement, making complex color shifts more approachable.
The three fundamental aspects of color manipulation within the HSL model are:
- Hue: This refers to the pure color itself, such as red, blue, or green. Adjusting the hue shifts a color along the color wheel.
- Saturation: This dictates the intensity or purity of a color. Increasing saturation makes a color more vivid, while decreasing it moves it towards grayscale.
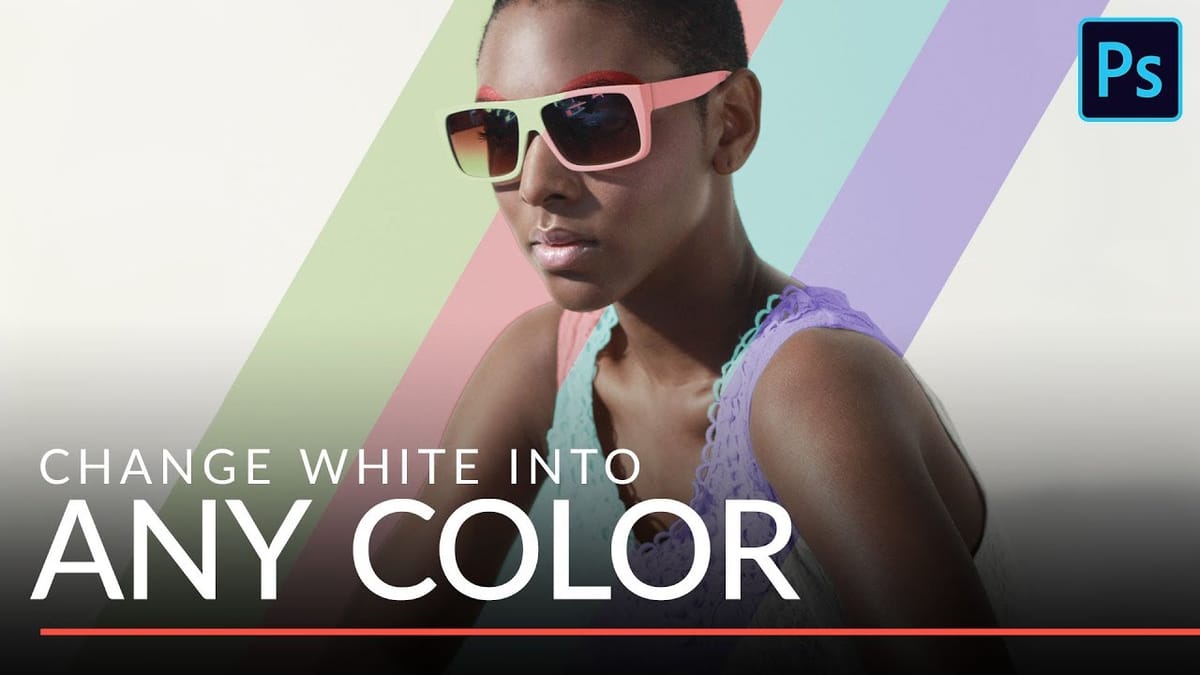
- Lightness: This controls the brightness or darkness of a color. Adjusting lightness can transform a color to white or black, and is crucial for integrating new colors into areas that might lack inherent color information, like pure whites or deep shadows.
Practical Tips for Adjusting Colors
- Access the new "Adjust Colors" feature through the contextual taskbar in the beta version of Photoshop, which can run side-by-side with your installed version.
- Utilize the "Adjust Colors" button to automatically create a Hue/Saturation adjustment layer and populate the properties panel with prominent colors in your image.
- Click on a dominant color identified by the tool to access its Hue, Saturation, and Lightness sliders for targeted adjustments.
- Refine color selections using the range slider and the plus/minus eyedroppers in the Properties panel to precisely include or exclude specific tones.
- Employ layer masks to fine-tune areas that were inadvertently affected by the global color change, painting with black to hide the adjustment and reveal original colors.
Related Articles and Tutorials about Color Adjustment
Explore more resources to enhance your color editing skills and discover various techniques for transforming image hues.