Dark under-eye circles can make portrait subjects look tired or unhealthy, even when they're not. Traditional brightening methods often create unnatural results or destroy important skin texture.
This tutorial demonstrates frequency separation, a professional retouching technique that removes dark circles while preserving natural skin texture and realistic lighting transitions.
Watch the Tutorial
Video by Photoshop Training Channel. Any links or downloads mentioned by the creator are available only on YouTube
Essential Tips for Dark Circle Removal
- Set up frequency separation properly: Create two layer duplicates, name them descriptively (high frequency texture and low frequency color/tone), and group them for organization.
- Use different Apply Image settings for different bit depths: 8-bit images need Subtract blending with offset 128 and scale 2, while 16-bit images require Add blending with invert checked and offset 0.
- Sample colors strategically: Hold Alt to eyedrop skin tones from healthy areas of the face, choosing colors that match the desired final appearance rather than trying to lighten existing dark areas.
- Build corrections gradually: Use low opacity (25%) and flow (25%) to paint corrections slowly, or enable pressure sensitivity if using a tablet for natural buildup.
- Switch to Lighten blending mode: Change your retouch layer to Lighten mode so corrections only affect darker areas while preserving original skin texture in lighter regions.
More Eye Retouching Tutorials
Explore additional techniques for enhancing and correcting eyes in portrait photography.
How to Enhance Dark Eyes in Photoshop Using Traditional and AI Techniques
Portrait photographers often face the challenge of completely dark, featureless eyes that resist traditional brightening techniques. When standard exposure adjustments fail to reveal detail, specialized methods can restore life and interest to these challenging areas.
This tutorial demonstrates two powerful approaches: a traditional texture-building technique using Photoshop's classic tools, and a modern AI-powered method that generates realistic iris patterns.
Watch the Tutorial
Essential

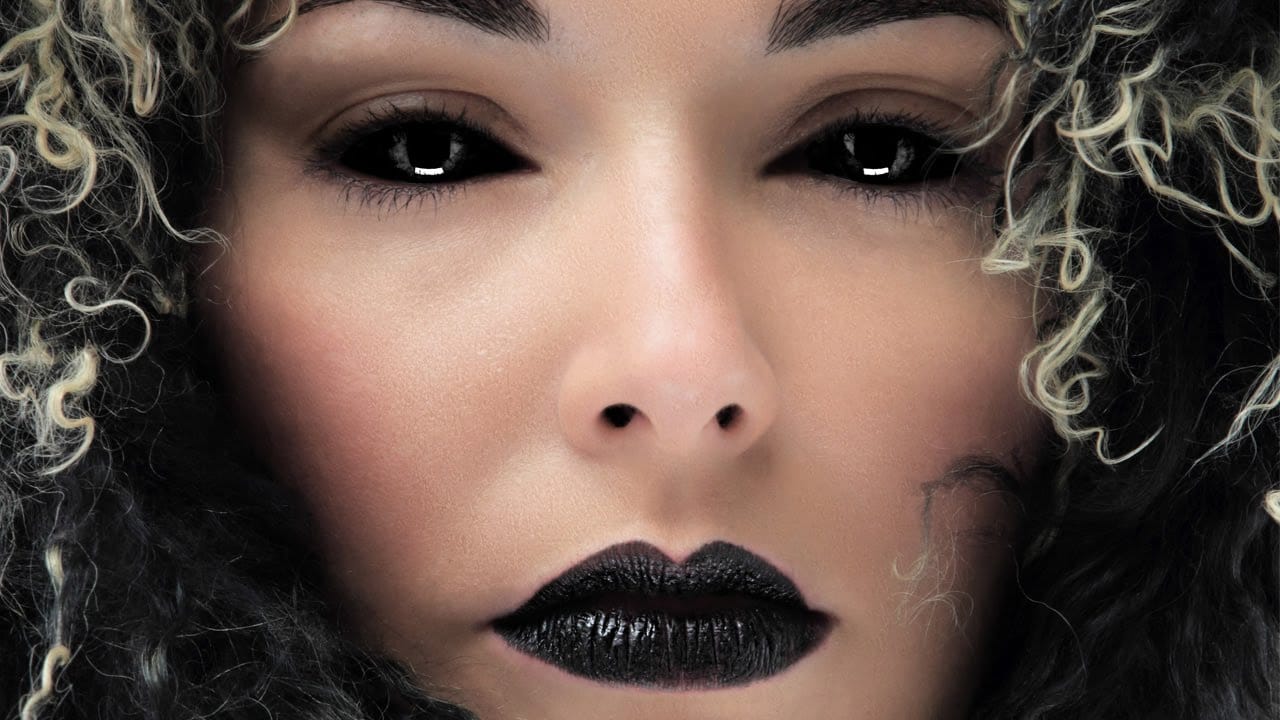
How to Black Out Eyes in Photoshop
Aaron Nace from Phlearn demonstrates how to create a spooky "black out" effect for eyes in Photoshop, perfect for Halloween or dramatic photo edits.
The tutorial focuses on retaining catch lights in the eyes for realism while painting the irises black using a brush tool. Key steps include using a Curves Adjustment Layer to darken the eyes and refining the transition with a soft-edged brush.
To enhance realism, Nace utilizes channel manipulation to restore depth and highlights to the eyes. By d
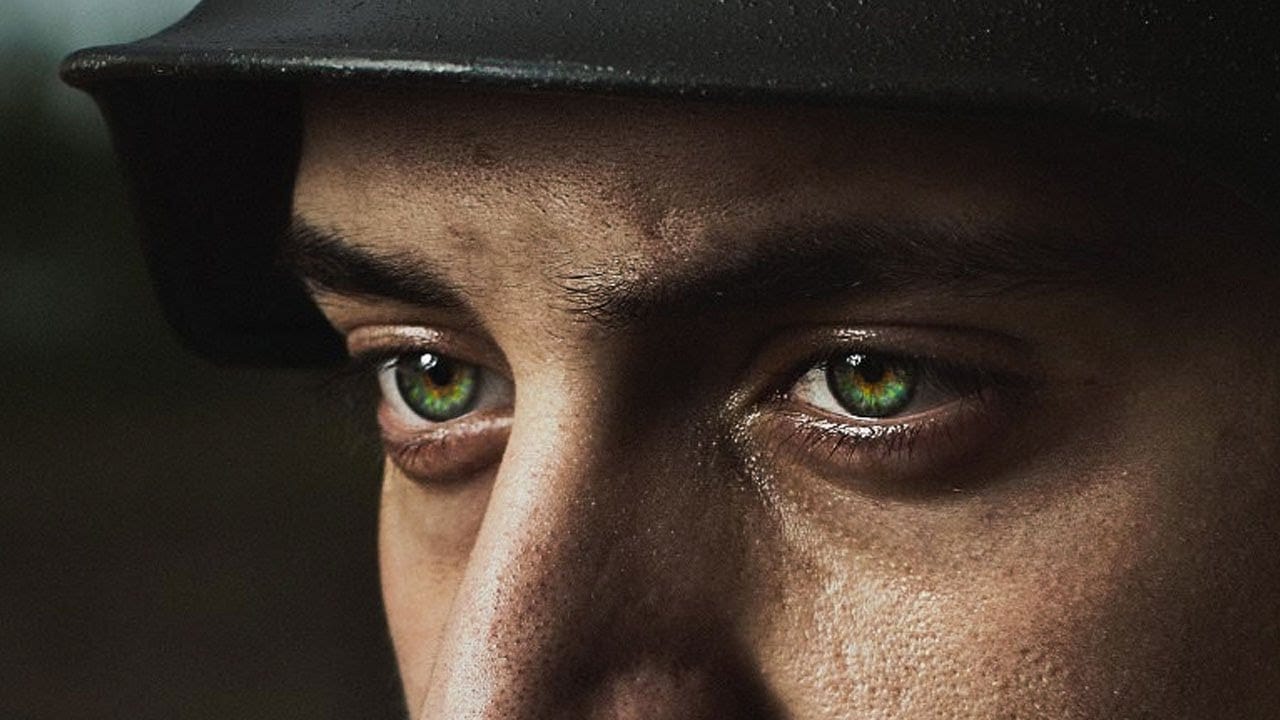
How to Color, Brighten and Sharpen Eyes in Photoshop
In this tutorial by Aaron Nace from Phlearn, learn how to enhance eyes in Photoshop to make them captivating and sharp.
Techniques include coloring the eyes by sampling natural hues and adjusting lightness and saturation, using blending modes like "Soft Light" or "Overlay" for a natural look, and softening edges with Gaussian Blur. Dodge and Burn techniques are used to enhance depth and light in the pupils, while selective sharpening draws attention to the eyes, making them stand out in portrai
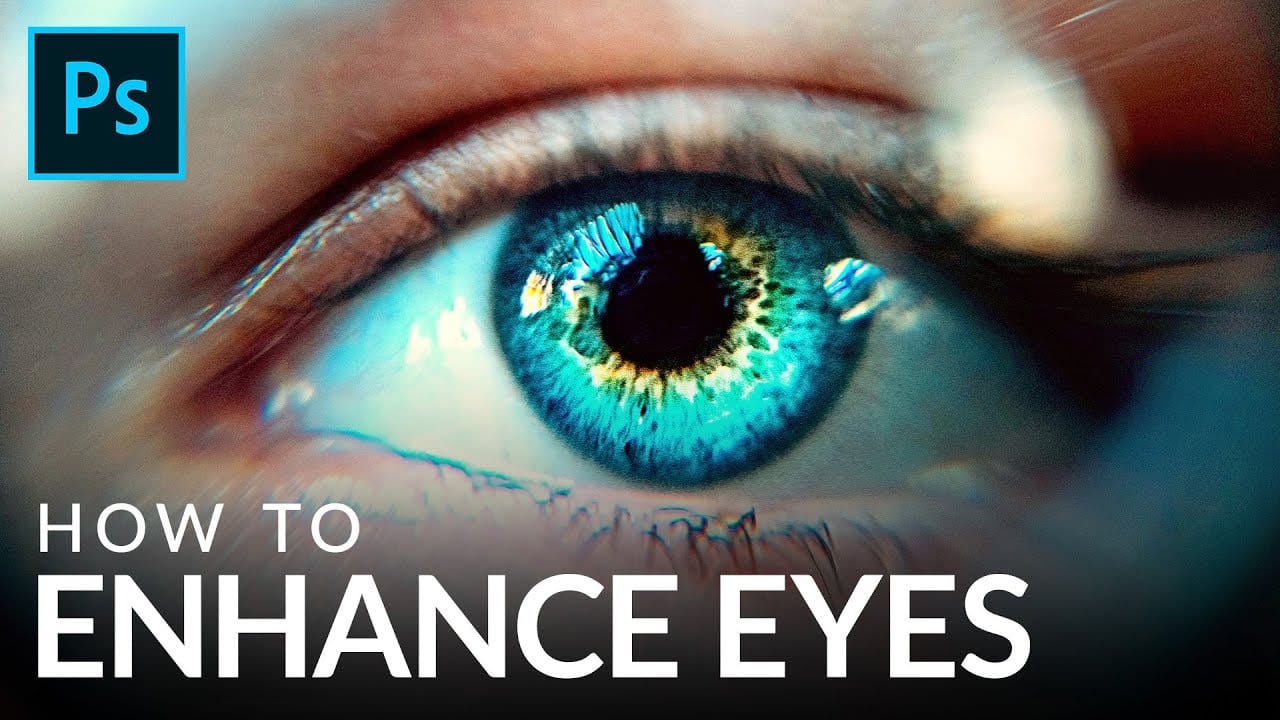
How to Enhance Eyes in Photoshop
In his tutorial, Aaron Nace, the founder of Phlearn, guides viewers through the process of enhancing any set of eyes to achieve their absolute best appearance. Nace demonstrates techniques using Photoshop's powerful tools, including Curves for sculpting highlights and shadows, Solid Color Fill Layers for color enhancement and adjustment, and the Unsharp Mask filter for professional-level sharpening.
The tutorial offers a comprehensive approach to eye retouching, equipping viewers with the skill