Turn ordinary text into a striking visual by filling it with an image. This popular design technique is perfect for posters and graphics. This tutorial shows you how to use clipping masks in Photoshop to easily place any photo inside your words.
Watch the Tutorial
Video by PHLEARN. Any links or downloads mentioned by the creator are available only on YouTube
Practical Tips for Creating Image-Filled Text
Follow these key steps from the video to master this simple yet powerful technique.
- Choose a bold font. Use a thick, bold typeface so that more of your image is visible inside the letters.
- Adjust letter spacing. Bring letters closer together by adjusting the tracking and kerning to create a more unified canvas for your image.
- Use a clipping mask. Place your image layer above the text layer, right-click the image, and select "Create Clipping Mask" to confine the photo to the text shape.
- Add a subtle drop shadow. Apply a drop shadow via Layer Effects to the text layer to create separation and make your design stand out from the background.
- Create a complementary background. Add a solid color layer and use the eyedropper tool to sample a color directly from your image for a cohesive look.
More Tutorials About Photoshop Text Effects
Explore other creative ways to work with text and images in Photoshop.
Inserting Multiple Images Inside Text In Photoshop
Placing multiple images inside text in Adobe Photoshop is a popular design technique that can add visual interest and depth to your designs. This technique involves inserting images into letters or words to create an eye-catching and unique design.
The Clipping Mask feature in Photoshop is used to achieve this effect. Clipping masks allow you to use one layer to define the shape of another layer, making it ideal for inserting images into text. With this technique, the possibilities are endless

How to Place Text Behind an Object in a Photo
In this tutorial by Justin Odisho, you'll learn how to place text or any object behind or between objects in a photo using Adobe Photoshop.
Justin guides you through a few easy steps to achieve this effect, demonstrating techniques to manipulate layers and utilize masking effectively. Whether you're enhancing a composition or creating a visual story with layered elements, this tutorial equips you with practical skills to creatively position text and objects within complex images.
Ideal for bot

Create handwritten text in Photoshop
In this tutorial, you will discover how to create handwritten text in Photoshop. The process is straightforward and involves a few simple steps. First, you'll need to choose a font that resembles handwritten text. Once you've selected the appropriate font, you can start typing out your desired text and adjust the size and positioning to your liking.
Next, you'll want to add some texture to the text to make it look more authentic. This can be achieved by using various Photoshop tools, such as th

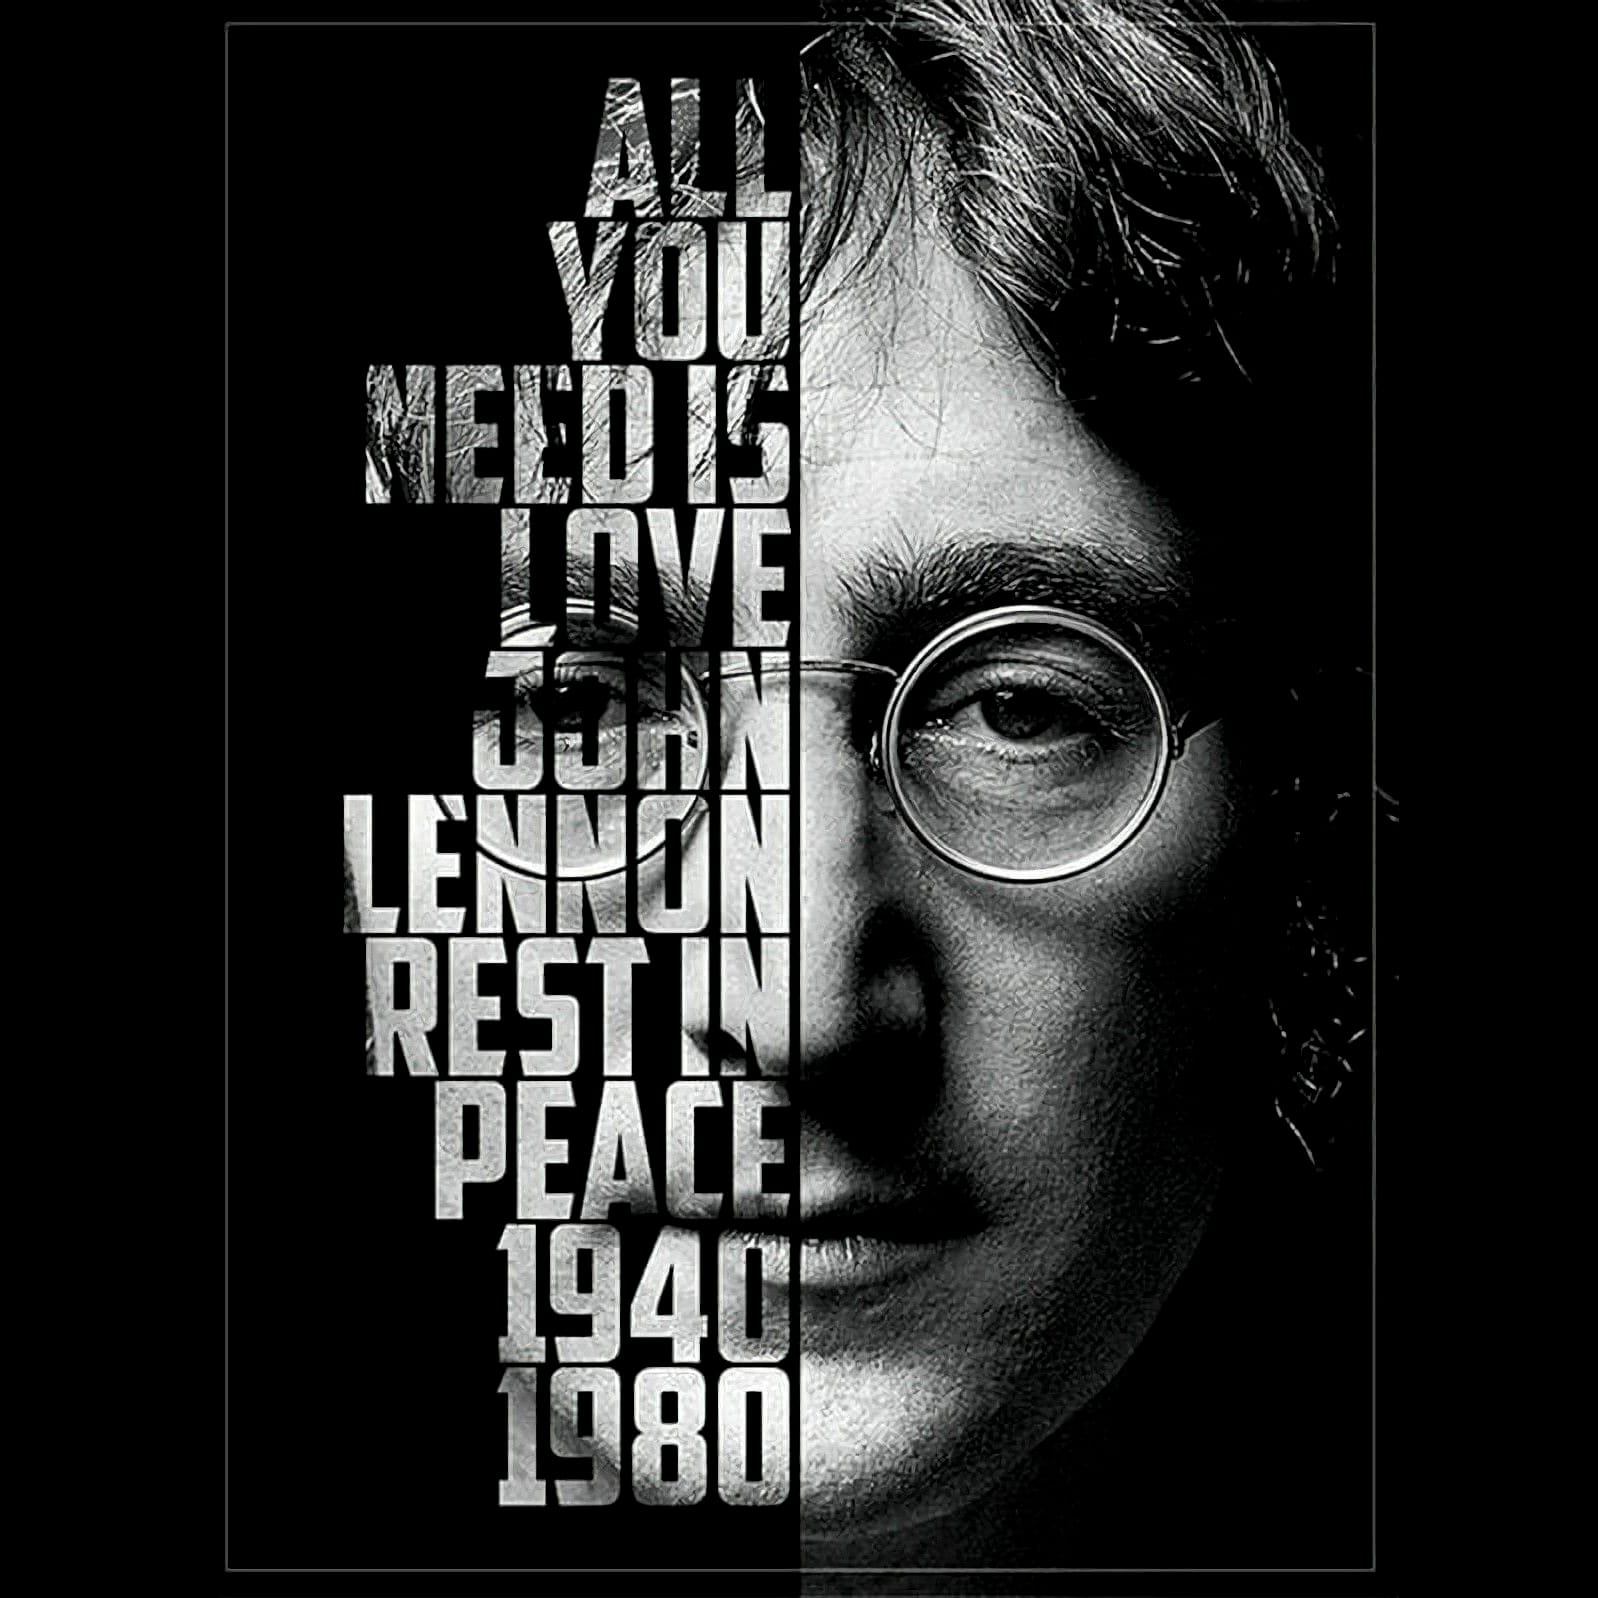
Create a cool text portrait in Photoshop
This tutorial explores the process of creating a powerful typographic portrait poster using Adobe Photoshop. It transforms a standard photo into a visually striking artwork where text forms the contours of a subject's face.
Viewers will learn essential Photoshop techniques, from precise subject selection and background preparation to the artful integration of text and subtle refinements that enhance legibility and visual impact.
Watch the Video
The Art of Typographic Portraiture
Typographi