How to Match Color in Photoshop for Beginners

How to Match Color in Photoshop for Beginners

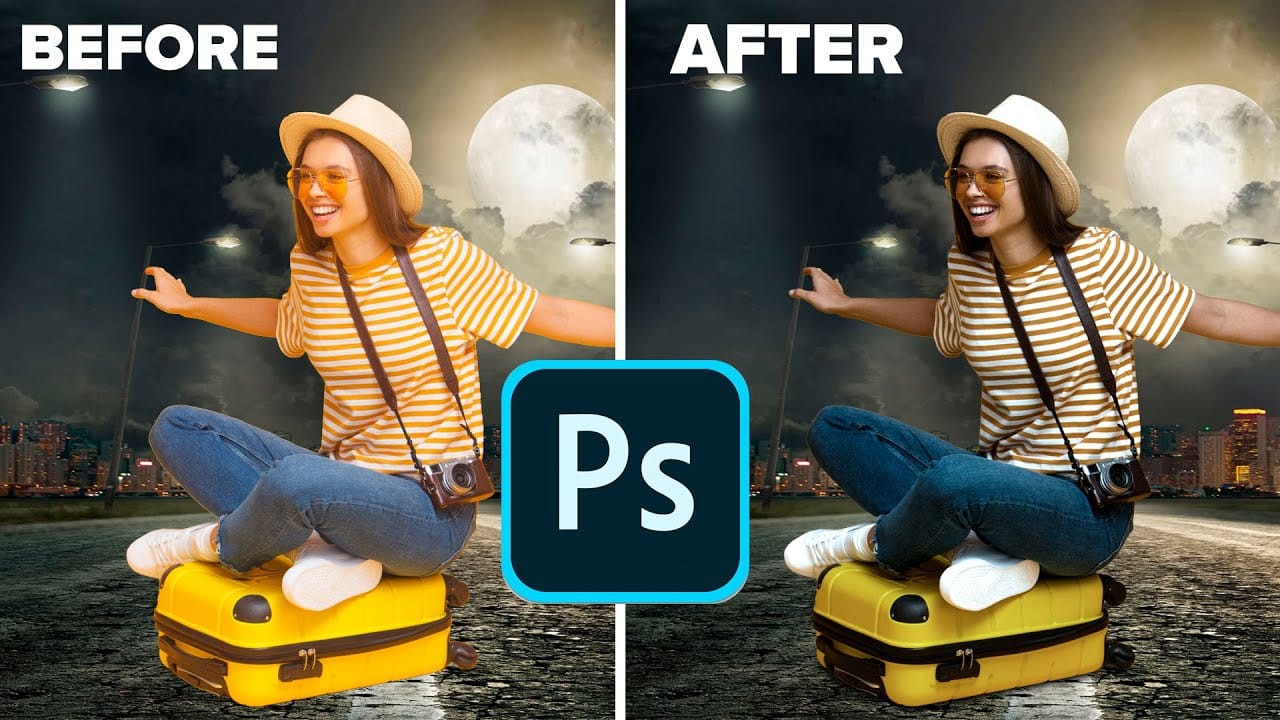
Compositing images often requires precise color matching. When combining elements from different sources, slight variations in tone can disrupt the visual harmony, making the final image appear unnatural. Achieving a cohesive look is crucial for professional results.

This tutorial offers a straightforward method to blend disparate image elements seamlessly. The video demonstrates how to use Photoshop's built-in tools, specifically the Curves adjustment layer and Camera Raw, to unify the color profiles of your composite images. It simplifies a complex process, allowing beginners to create more realistic and polished digital art.

Watch the Tutorial

Video by Brendan Williams. Any links or downloads mentioned by the creator are available only on YouTube

Achieving Visual Harmony Through Color Matching

When combining images, visual discrepancies are often immediately apparent. These differences, especially in color and lighting, break the illusion of a single, unified scene. Effective color matching addresses these issues by aligning the chromatic properties of different image sources, creating a believable and polished composite.

A well-executed composite feels natural, as if all elements belong together from the start. This involves more than just aligning edges; it requires a deep understanding of how light interacts with surfaces and how colors influence perception. For instance, mismatched color temperatures can instantly reveal an image as a composite, even to an untrained eye.

While various tools exist for color correction, the challenge lies in applying them harmoniously across multiple layers. Techniques can range from simple global adjustments to highly localized modifications, each serving to unify the composite's overall palette. Beyond mere color correction, subtle grading can further enhance the mood and narrative, integrating elements into a compelling visual story.

Practical Tips for Color Matching Composites

  • Apply a Curves adjustment layer to your subject layer, ensuring it uses a clipping mask to affect only that layer.
  • Utilize the Curves Auto Options to find dark and light colors, sampling the darkest and brightest areas of your background for initial color alignment.
  • Manually adjust the black and white points of your Curves layer to fine-tune contrast after the auto-adjustment, visually blending your subject with the background.
  • Convert all layers into a Smart Object before applying a Camera Raw filter, allowing for non-destructive global color grading and further blending.
  • Use Camera Raw for final, global color adjustments, such as warming or cooling the overall image, to achieve a cohesive final look.

Explore more resources to enhance your color editing and compositing skills in Photoshop.

Quick and Easy Method for Color Matching Images in Photoshop
Achieving visual harmony in composite images is a cornerstone of professional photo editing. When combining elements from different sources, discrepancies in color and lighting can immediately break the illusion of a unified scene, making the final image appear unnatural or poorly constructed. This tutorial demonstrates a straightforward yet powerful method within Photoshop to perfectly align the color profiles of disparate images. Viewers will learn how to leverage Photoshop's built-in tools t
How to perfectly match colors in Photoshop when combining photos
In this insightful tutorial, Colin Smith from Photoshop Cafe teaches you how to seamlessly match colors when combining multiple images in Photoshop. This process is crucial for ensuring that different layers or photographs blend together naturally and look cohesive. Colin demonstrates how to use the Match Color feature to align the tones and hues of different images. He also covers techniques for creating grounding shadows, which help to anchor the combined elements and enhance the overall inte
Six easy ways to select colors in Photoshop
In this episode of "3, 2, 1… Photoshop!", longtime Adobe evangelist Julieanne Kost shares essential tips and tricks for selecting colors in Photoshop. Julieanne introduces six easy methods to choose colors effectively, whether you're working on a detailed project or just need a quick color pick. You'll learn how to use the eyedropper tool for precise color selection, manipulate foreground and background colors, and utilize the heads-up-display (HUD) color picker for a more interactive experienc
How to colorize photos in Photoshop
In this episode, Adobe Evangelist Paul Trani demonstrates how to instantly colorize photos in Photoshop using the new Neural Filters. This feature allows you to bring new life to black-and-white images, from landscapes to your old family photos, with just a few clicks. Paul walks you through the process of accessing and applying the Neural Filters to your photos. You'll learn how these advanced filters use artificial intelligence to analyze your image and apply realistic colorization based on t

Get tutorials & freebies delivered to you.

Subscribe to the Photoshop Roadmap newsletter, a weekly roundup of new tutorials, insights and quality downloads, trusted by 6500+ readers.

You might also like

Complete Photoshop Editing Workflow: 5 Steps from Raw to Polished

Photoshop offers endless possibilities for photo enhancement, but many photographers never move beyond basic adjustments because the software feels overwhelming. This comprehensive workflow breaks down photo editing into five manageable stages that work consistently across different photography styles. The systematic approach covers everything from initial raw processing to advanced lighting...

Photoshop Workspace Basics: Navigation, Zooming, and Essential Interface Elements

Photoshop's interface can feel overwhelming when you first open the program. Dozens of panels, tools, and menus compete for attention, making simple tasks feel complicated. This tutorial breaks down the essential workspace elements and teaches fundamental navigation skills that form the foundation of efficient Photoshop work. Watch the...

How to Restore Old Damaged Photos Using Nano Banana in Photoshop

Old family photos with scratches, tears, and missing sections can seem beyond repair. Google's Nano Banana AI model, now integrated into Photoshop, makes full restoration possible in minutes rather than hours. This powerful tool excels at maintaining facial characteristics while automatically filling in damaged areas and adding realistic...

How to Get Higher Quality Results from Photoshop's Generative Fill Tool

Photoshop's Generative Fill creates impressive AI extensions, but the results often look blurry and pixelated when viewed at full size. This quality limitation makes many AI-generated areas unusable for printing or large displays. This technique shows how to work around the 1024x1024 pixel quality limit to create much...

How to Use Photoshop's Liquify Tool for Non-Destructive Portrait Retouching

Clothing wrinkles, hair that lacks volume, and awkward fabric bunching can distract from an otherwise great portrait. Photoshop's Liquify tool offers a powerful solution for smoothing out these issues while preserving the natural look of your subject. This tutorial demonstrates how to use the Liquify tool non-destructively with...

You’ve successfully subscribed to Photoshop Roadmap
Welcome back! You’ve successfully signed in.
Great! You’ve successfully signed up.
Success! Your email is updated.
Your link has expired
Success! Check your email for magic link to sign-in.