How to Create Glitch Effects in Photoshop Using the Wave Filter

How to Create Glitch Effects in Photoshop Using the Wave Filter

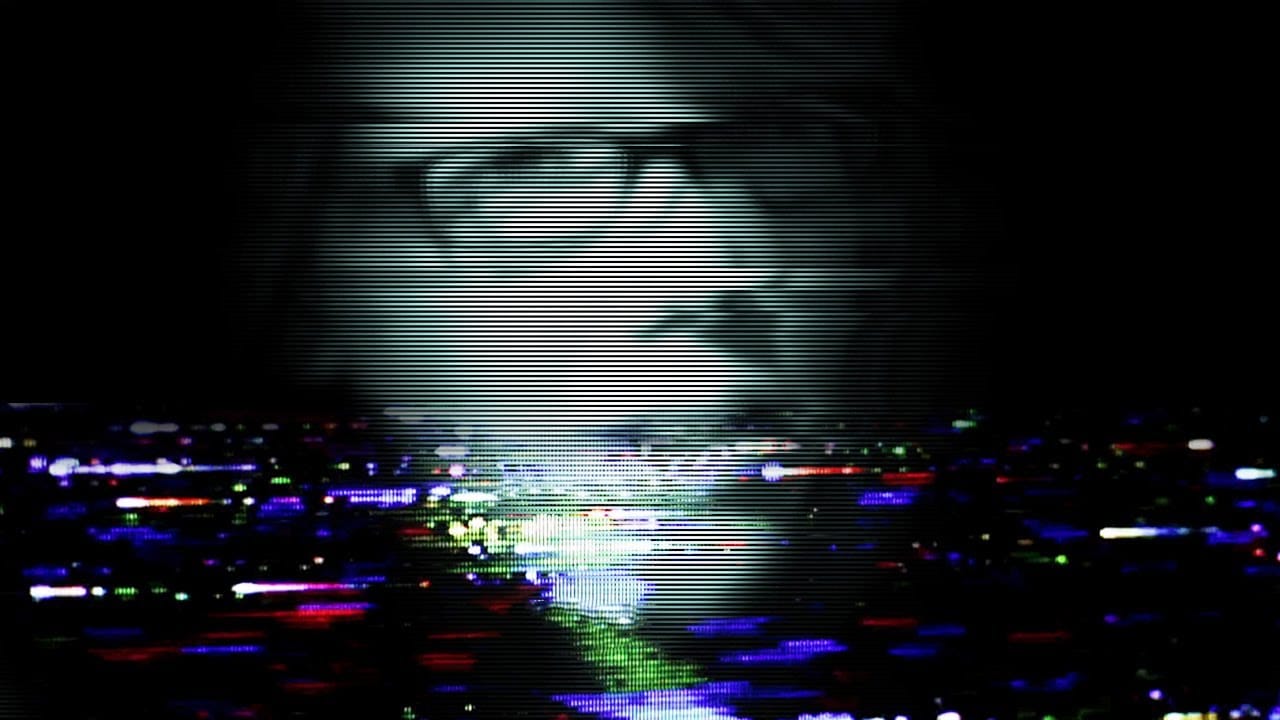
Digital glitches transform ordinary images into striking visual disruptions that capture attention instantly. The aesthetic of broken pixels, stretched sections, and fragmented visuals has become a powerful design element in contemporary digital art. This tutorial demonstrates a hidden technique using Photoshop's Wave filter to create authentic-looking glitch effects. Learn how to manipulate wavelength, amplitude, and scale settings to produce convincing digital distortions.

Watch the Video

Video by P A N T E R. Any links or downloads mentioned by the creator are available only on YouTube

Understanding Glitch Art and Digital Distortion

Glitch art emerged from actual technical malfunctions in digital systems, where corrupted data created unexpected visual patterns. Artists began deliberately recreating these errors as an aesthetic choice, turning digital mistakes into intentional design elements. The Wave filter in Photoshop simulates one of the most common types of digital corruption: horizontal and vertical displacement of pixel data. Real glitches often occur when image data gets misinterpreted during transmission or storage, creating the characteristic stretched and fragmented appearance that defines this visual style. Working with smart objects preserves the original image data while allowing multiple iterations of the effect. This non-destructive workflow lets you experiment with different distortion levels and combine multiple glitch variations without permanently altering your source material.

Essential Tips for Creating Wave Filter Glitches

- Convert your layer to a smart object before applying the Wave filter to maintain editing flexibility - Set the shape to Square and reduce generators to 2 for cleaner, more controlled distortion patterns - Decrease the bottom scale to zero and maximize wavelength values for dramatic horizontal stretching effects - Use the Randomize button to generate unexpected variations quickly, then fine-tune the results - Paint on the smart filter mask with black to hide glitch effects in specific areas, or white to restore them

More Tutorials about Glitch Effects

Explore additional techniques for creating digital distortion effects in Photoshop.

Create a Glitch Art Effect in Photoshop
Glitch art has emerged as a distinctive aesthetic in the digital age, rooted in the unexpected visual outcomes of digital errors. This art form transforms technical malfunctions into deliberate creative expressions, offering a unique visual language. This tutorial explores how to simulate this captivating effect from a standard photograph in Photoshop, guiding you through the essential steps to transform your images into compelling glitch art pieces. Watch the Video The Digital Aesthetic of
Hidden trick to perfectly sharpen photos in Photoshop
In this detailed tutorial, Colin Smith from Photoshop Cafe uncovers a sophisticated technique for achieving impeccable sharpening results in Photoshop. He dives deep into three essential sharpening methods: Smart Sharpen, High Pass, and Unsharp Mask, each of which offers distinct advantages depending on your editing needs. Colin's approach goes beyond basic sharpening techniques, incorporating a clever twist that enhances the effectiveness of these tools. He demonstrates how to leverage Smart S
Make yourself invisible in Photoshop
According to the author, making yourself invisible in Photoshop is a simple process that anyone can do. The key is to take the right pictures to make the job easy in Photoshop. In this tutorial, Aaron Nace from Phlearn will guide you through the process of taking multiple photos and provide tips and tricks to make the job easy and fun. The basic idea behind making a person invisible has to do with taking a "base image" of anyone and then taking supplemental photos to composite over top the base
Double Exposure Glitch Poster Design in Photoshop
In this Photoshop tutorial by Click3D, you'll learn how to create a striking double exposure glitch poster design. The tutorial guides you through the process step by step, starting with the basics of setting up your project and selecting your images. You'll discover how to combine double exposure techniques with glitch effects to achieve a unique and eye-catching design. The tutorial covers essential steps like blending layers, applying distortion effects, and refining your poster to enhance t

Get tutorials & freebies delivered to you.

Subscribe to the Photoshop Roadmap newsletter, a weekly roundup of new tutorials, insights and quality downloads, trusted by 6500+ readers.

You might also like

Complete Photoshop Editing Workflow: 5 Steps from Raw to Polished

Photoshop offers endless possibilities for photo enhancement, but many photographers never move beyond basic adjustments because the software feels overwhelming. This comprehensive workflow breaks down photo editing into five manageable stages that work consistently across different photography styles. The systematic approach covers everything from initial raw processing to advanced lighting...

Photoshop Workspace Basics: Navigation, Zooming, and Essential Interface Elements

Photoshop's interface can feel overwhelming when you first open the program. Dozens of panels, tools, and menus compete for attention, making simple tasks feel complicated. This tutorial breaks down the essential workspace elements and teaches fundamental navigation skills that form the foundation of efficient Photoshop work. Watch the...

How to Restore Old Damaged Photos Using Nano Banana in Photoshop

Old family photos with scratches, tears, and missing sections can seem beyond repair. Google's Nano Banana AI model, now integrated into Photoshop, makes full restoration possible in minutes rather than hours. This powerful tool excels at maintaining facial characteristics while automatically filling in damaged areas and adding realistic...

How to Get Higher Quality Results from Photoshop's Generative Fill Tool

Photoshop's Generative Fill creates impressive AI extensions, but the results often look blurry and pixelated when viewed at full size. This quality limitation makes many AI-generated areas unusable for printing or large displays. This technique shows how to work around the 1024x1024 pixel quality limit to create much...

How to Use Photoshop's Liquify Tool for Non-Destructive Portrait Retouching

Clothing wrinkles, hair that lacks volume, and awkward fabric bunching can distract from an otherwise great portrait. Photoshop's Liquify tool offers a powerful solution for smoothing out these issues while preserving the natural look of your subject. This tutorial demonstrates how to use the Liquify tool non-destructively with...

You’ve successfully subscribed to Photoshop Roadmap
Welcome back! You’ve successfully signed in.
Great! You’ve successfully signed up.
Success! Your email is updated.
Your link has expired
Success! Check your email for magic link to sign-in.