Transform plain text into a captivating cloud effect, adding a dramatic touch to your designs. This tutorial guides you through creating a realistic, aged cloud text effect in Photoshop.
Master the use of custom brushes to achieve this ethereal look, enhancing your graphic design projects with unique visual interest.
Watch the Video
Practical Tips for Cloud Text Effects
Achieving a realistic cloud text effect requires careful attention to detail and smart use of Photoshop features.
- Use a bold font for your initial text layer to provide a clear shape for the cloud effect.
- Create a new layer for each cloud brush you use, allowing for easy adjustments and non-destructive editing.
- Load custom ABR brush files by dragging and dropping them directly into Photoshop to access a variety of cloud textures.
- Rotate your brushes in the brush palette to paint vertical strokes and add depth to your cloud formations.
- Convert your assembled cloud layers into a Smart Object to apply global effects like drop shadows while retaining editability.
More Tutorials about Text Effects in Photoshop
Explore additional techniques to elevate your text designs with these related articles and tutorials.
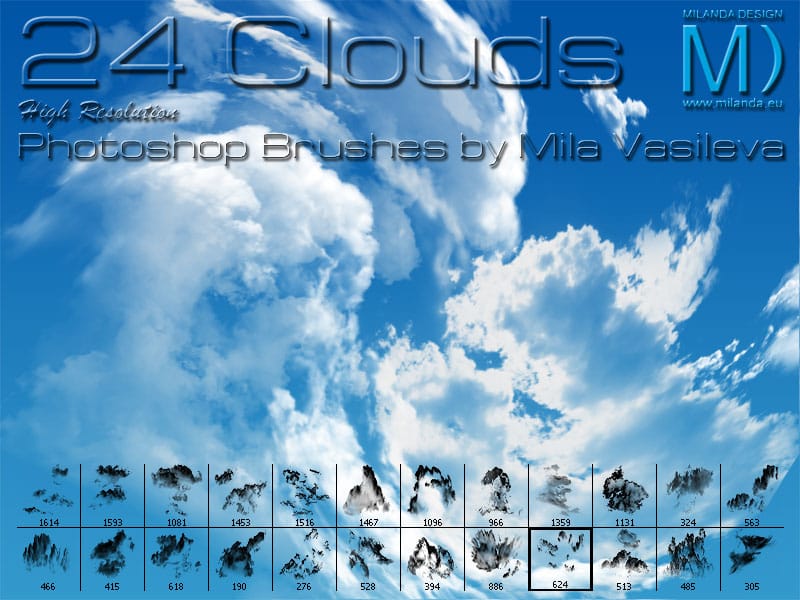
24 Clouds Photoshop Brushes
The author of this set of high-resolution Adobe Photoshop brushes has created a unique collection inspired by the natural beauty of clouds. The set includes 24 brushes, each one crafted from real cloud formations. One of the standout features is the inclusion of a mushroom cloud brush, adding a touch of drama to any digital artwork.
The brushes range in size from 190 to 1614 pixels, providing users with a versatile tool kit that can be used for a wide variety of projects. Whether you're a graph
Realistic Fire Text Effect In Photoshop
In this Photoshop text effects tutorial by Jesus Ramirez from PTC Photoshop Training Channel you are going to learn how to create a vibrant flaming text effect.
This effect will be created from scratch, without using any photographs. The flames will be created with The Flame Generator filter, a feature found in Photoshop CC. This filter is designed to render realistic flames on user-defined paths.
Watch tutorial

Dramatic Shadow Text Effect in Photoshop
Graphic designers often seek distinctive ways to make text stand out in their compositions. Creating unique text effects can significantly enhance visual appeal, adding depth and intrigue to various designs.
This tutorial demonstrates a method for producing mysterious, overlapping shadow text complete with a realistic reflection. Viewers will explore techniques for precise character manipulation and gradient applications to achieve a powerful visual impact.
Watch the Tutorial: Overlapping Sha

Colorful Glossy and Shiny 3D Text Effect in Photoshop
In this Envato Tuts+ tutorial, Monikazza Grubena demonstrates how to create a glossy text effect in Photoshop using the layer style panel.
The tutorial is straightforward and efficient, ideal for both beginners and experienced users. Monikazza explains the process clearly, making it easy to follow along and replicate the effect on your own projects. The tutorial also highlights the value of Envato Elements, which offers a wide range of professional shiny and glossy text effects, along with othe