Creating Pixelated Dither Effects in Photoshop

Creating Pixelated Dither Effects in Photoshop

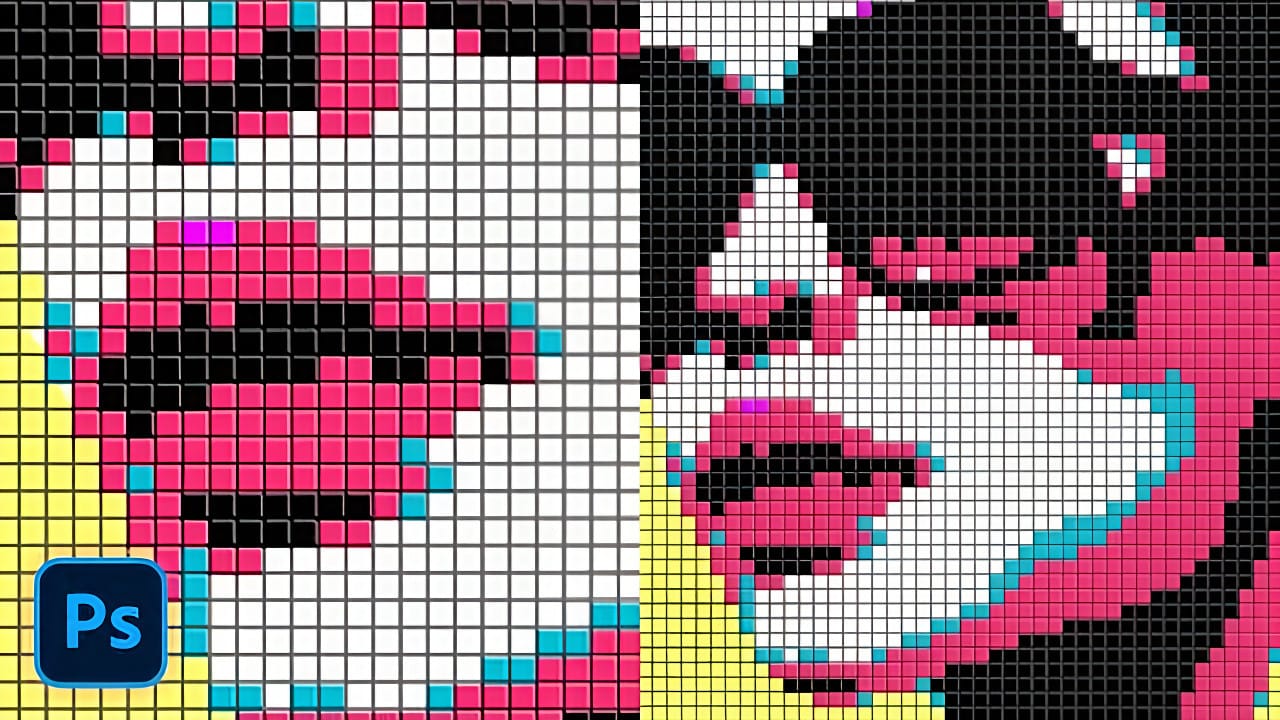
The pixelated dither effect transforms modern photographs into retro-inspired artwork reminiscent of early video games and vintage computer graphics. This distinctive visual style uses controlled color reduction and strategic pixelation to create images that balance nostalgic charm with contemporary design appeal.

The technique relies on Photoshop's export settings and specific file format workflows to achieve authentic dithering patterns. By manipulating resolution, color depth, and dithering algorithms, you can control the final aesthetic and create striking visual results.

Watch the Tutorial

Video by P A N T E R. Any links or downloads mentioned by the creator are available only on YouTube

Understanding Dithering Techniques

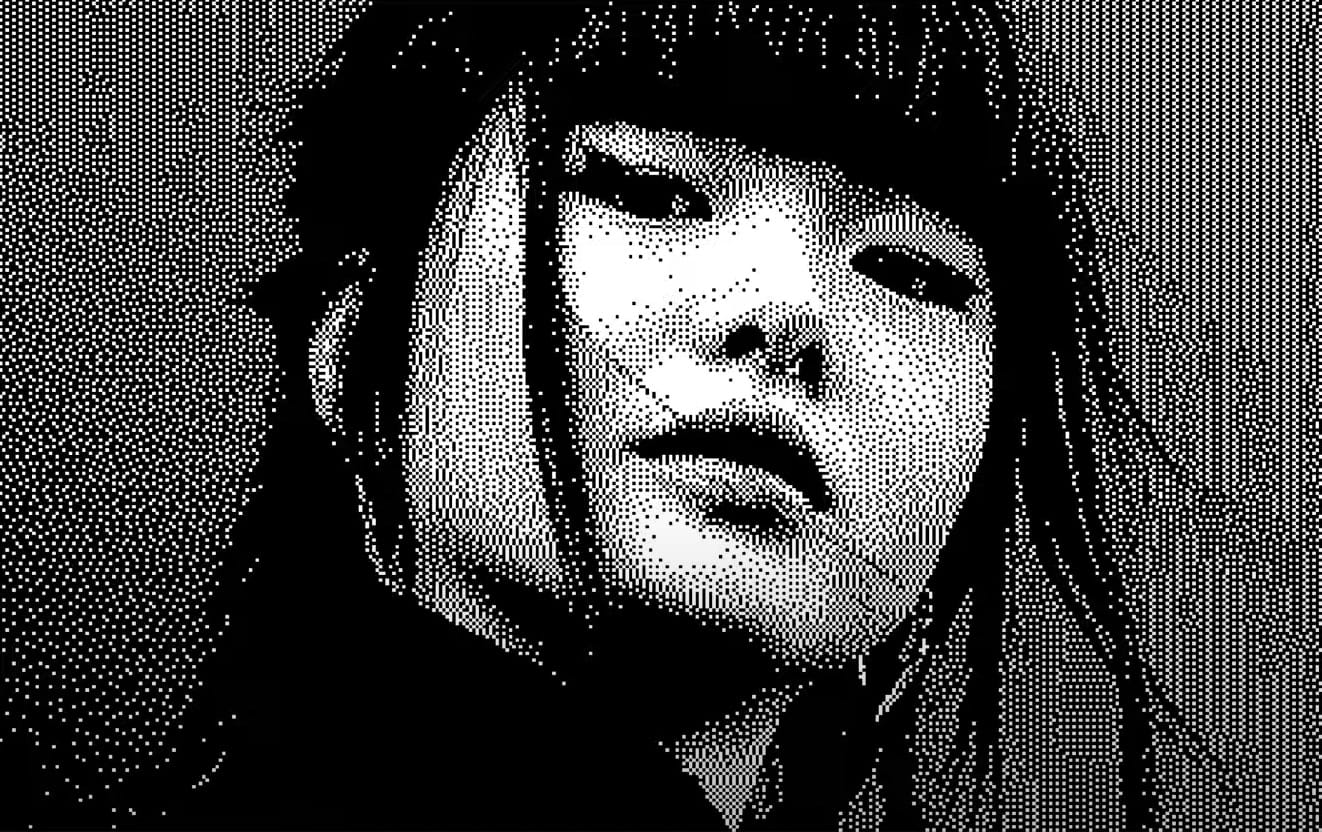
Dithering creates the illusion of color gradients using limited color palettes. The technique originated from early computer graphics when hardware limitations required creative solutions for displaying complex images with minimal color information.

The Save for Web Legacy dialog offers multiple dithering algorithms, each producing different visual characteristics. Diffusion dithering creates organic, scattered patterns, while pattern dithering produces more structured, geometric results.

Key concepts for effective dithering include:

  • Color reduction — Limiting the palette forces more pronounced dithering patterns
  • Resolution control — Lower resolutions create larger, more visible pixels
  • Algorithm selection — Different methods produce distinct aesthetic results
  • Format considerations — GIF format limitations affect the final output
  • Upscaling methods — Proper resampling preserves the pixelated appearance

Practical Tips for Dithered Effects

  • Reduce image width to 200-300 pixels before applying dithering for optimal pixel visibility
  • Limit colors to 8 or fewer in the GIF export settings to force stronger dithering patterns
  • Use Nearest Neighbor resampling when upscaling to maintain sharp pixel edges
  • Experiment with diffusion versus pattern dithering to match your desired aesthetic
  • Manually adjust individual colors in the color table to enhance specific tones

Explore more techniques for creating distinctive pixelated and digital art effects.

Create a pixelated dispersion effect in Photoshop
In this Photoshop tutorial, the author provides step-by-step instructions on how to create a captivating Pixelated dispersion effect. The tutorial utilizes a Pixel brush set, as well as various filters, to achieve the desired visual impact. The author guides the reader through the process, highlighting the key techniques and tools necessary to replicate the effect. By following the instructions, users can transform their images and add a unique, eye-catching element to their digital creations.
Creating a Colorful Pixelated Effect in Photoshop
The colorful pixelated effect transforms ordinary photographs into vibrant, retro-style artwork reminiscent of 8-bit video games and digital pop art. This distinctive visual style combines traditional mosaic filtering with advanced color manipulation to create bold, simplified imagery that captures attention. This technique works particularly well for portraits, creating striking poster-like results that blend nostalgic pixel aesthetics with modern design sensibilities. Watch the Tutorial U
Creating a Bitmap Diffusion Dither Effect in Photoshop
Bitmap dithering creates distinctive black and white patterns that transform photographs into stylized, high-contrast artwork. This technique produces scattered dot patterns that maintain visual detail while reducing images to pure monochrome values, offering a unique alternative to traditional bitmap conversion methods. This tutorial demonstrates how to achieve professional bitmap diffusion effects using Photoshop's export settings and specific file format workflows. You'll learn to control di
Create a amazing dispersion effect in Photoshop
This tutorial will show you how to make a photo of a model dissolving into flying particles. It's a simple process that only requires a few steps. First, the user will learn techniques to improve the colors of the image. They'll adjust the levels and curves to enhance the vibrancy and contrast of the photograph. This will help the dispersion effect stand out more prominently. Then, the user will apply the dispersion effect, making the model appear to break apart into small pieces that drift aw

Get tutorials & freebies delivered to you.

Subscribe to the Photoshop Roadmap newsletter, a weekly roundup of new tutorials, insights and quality downloads, trusted by 6500+ readers.

You might also like

Complete Photoshop Editing Workflow: 5 Steps from Raw to Polished

Photoshop offers endless possibilities for photo enhancement, but many photographers never move beyond basic adjustments because the software feels overwhelming. This comprehensive workflow breaks down photo editing into five manageable stages that work consistently across different photography styles. The systematic approach covers everything from initial raw processing to advanced lighting...

Photoshop Workspace Basics: Navigation, Zooming, and Essential Interface Elements

Photoshop's interface can feel overwhelming when you first open the program. Dozens of panels, tools, and menus compete for attention, making simple tasks feel complicated. This tutorial breaks down the essential workspace elements and teaches fundamental navigation skills that form the foundation of efficient Photoshop work. Watch the...

How to Restore Old Damaged Photos Using Nano Banana in Photoshop

Old family photos with scratches, tears, and missing sections can seem beyond repair. Google's Nano Banana AI model, now integrated into Photoshop, makes full restoration possible in minutes rather than hours. This powerful tool excels at maintaining facial characteristics while automatically filling in damaged areas and adding realistic...

How to Get Higher Quality Results from Photoshop's Generative Fill Tool

Photoshop's Generative Fill creates impressive AI extensions, but the results often look blurry and pixelated when viewed at full size. This quality limitation makes many AI-generated areas unusable for printing or large displays. This technique shows how to work around the 1024x1024 pixel quality limit to create much...

How to Use Photoshop's Liquify Tool for Non-Destructive Portrait Retouching

Clothing wrinkles, hair that lacks volume, and awkward fabric bunching can distract from an otherwise great portrait. Photoshop's Liquify tool offers a powerful solution for smoothing out these issues while preserving the natural look of your subject. This tutorial demonstrates how to use the Liquify tool non-destructively with...

You’ve successfully subscribed to Photoshop Roadmap
Welcome back! You’ve successfully signed in.
Great! You’ve successfully signed up.
Success! Your email is updated.
Your link has expired
Success! Check your email for magic link to sign-in.