Creating a Colorful Pixelated Effect in Photoshop

Creating a Colorful Pixelated Effect in Photoshop

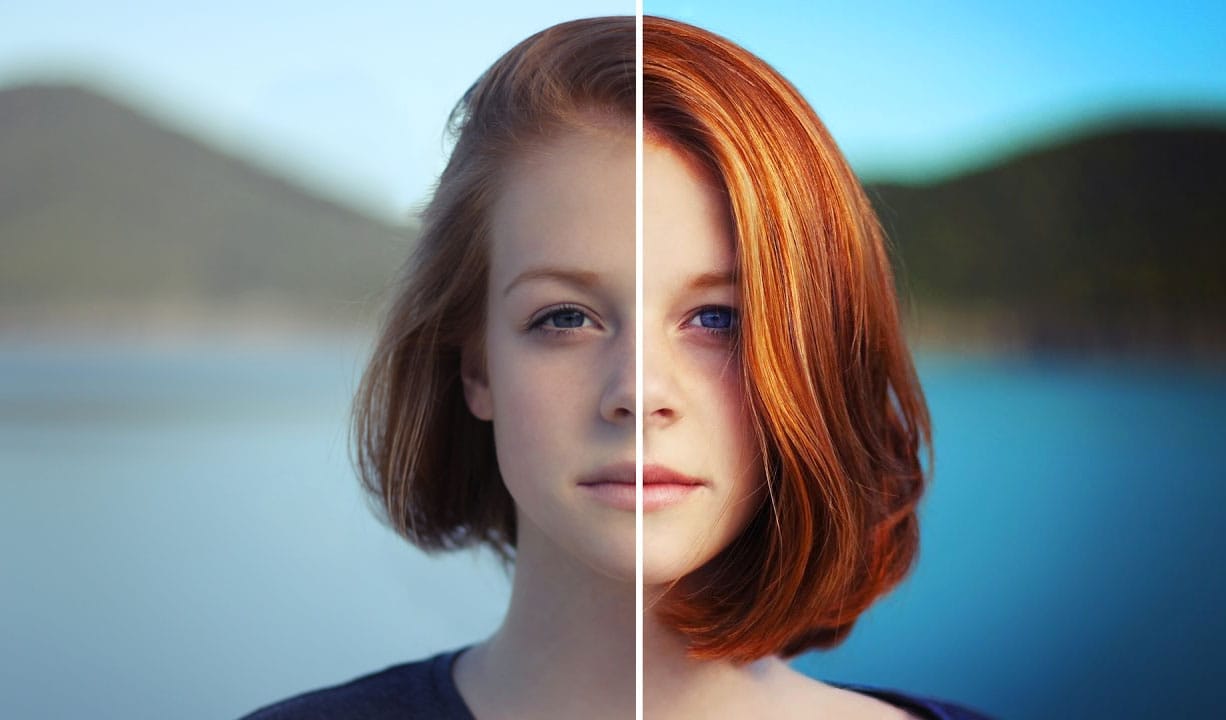
The colorful pixelated effect transforms ordinary photographs into vibrant, retro-style artwork reminiscent of 8-bit video games and digital pop art. This distinctive visual style combines traditional mosaic filtering with advanced color manipulation to create bold, simplified imagery that captures attention.

This technique works particularly well for portraits, creating striking poster-like results that blend nostalgic pixel aesthetics with modern design sensibilities.

Watch the Tutorial

Video by P A N T E R. Any links or downloads mentioned by the creator are available only on YouTube

Understanding Digital Pixelation and Color Reduction

Digital pixelation in graphic design serves as both a nostalgic callback and a powerful simplification tool. The effect mimics the visual constraints of early computer graphics while creating modern artistic interpretations. Mosaic filtering creates the basic pixel structure by grouping neighboring pixels into uniform squares, establishing the foundation for the retro aesthetic.

Color reduction through posterization plays a crucial role in achieving authentic pixel art appearance. By limiting the color palette to just a few dominant tones, the effect mirrors the technical limitations of vintage gaming systems. This process eliminates subtle gradations and forces bold color transitions that define the pixel art style.

The combination of geometric pixelation and strategic color manipulation creates imagery that feels both technically constrained and artistically intentional. Modern implementations can enhance this effect through selective color adjustments and custom grid overlays that emphasize the digital nature of the final result.

Practical Tips for Colorful Pixelation Effects

  • Work with high-resolution images initially to ensure clean pixel boundaries and better color sampling before applying the mosaic filter
  • Convert layers to Smart Objects before applying filters to maintain non-destructive editing capabilities throughout the process
  • Use posterization levels of 2-4 for authentic pixel art color reduction while maintaining sufficient visual detail
  • Apply curves adjustments after pixelation to enhance contrast and make subject details more prominent within the simplified color palette
  • Create custom grid patterns with subtle highlight effects to emphasize individual pixels and enhance the retro digital aesthetic

Explore more techniques for creating vibrant, stylized imagery in Photoshop.

Create a colorful wallpaper in Photoshop
In this Photoshop tutorial by Andrei Oprinca, you'll learn how to create an abstract wallpaper with colorful elements and effects. Oprinca starts by creating a new document with a light gray gradient background, converting it into a smart object, and adding noise. He then extracts a model's hair using the pen tool and refines the edges with the refine edge tool. Various shapes are added using the brush tool, lasso tool, and gradient tool, along with adjustment layers to alter the color tone. Le
How to make colors pop in Photoshop
Kelvin Pimont from Kelvin Designs shares his insights on how to make colors pop in Photoshop. The author explains that this tutorial will teach you how to transform dull photographs into more dramatic and colorful images. According to the author, the key is to make local adjustments to colors and contrast. By selecting specific areas of the image, you can enhance the colors and create a more impactful photo. The author will guide you through the process, showing you the steps to achieve this re
How to Apply Graphics and Change Colors in Photoshop
Integrating graphics and adjusting colors are fundamental skills in Photoshop, enabling designers and artists to transform disparate elements into cohesive visual narratives. From compositing a logo onto a product image to blending text into a scene, mastering these techniques is crucial for achieving professional results. This video demonstrates practical methods for seamlessly applying graphics from one image to another, extracting specific elements like text, and efficiently changing their c
Colorful Graffiti Text Effect in Photoshop
In this tutorial from PhoTuts, you'll learn to create a vibrant and editable graffiti text effect on a concrete wall using basic Photoshop techniques. Embracing an urban street art style, the tutorial guides you through transforming text into striking graffiti, complete with bold colors and realistic textures. Perfect for adding an edgy, contemporary flair to your designs, this tutorial offers insights into creating impactful digital art inspired by street culture. Watch tutorial

Get tutorials & freebies delivered to you.

Subscribe to the Photoshop Roadmap newsletter, a weekly roundup of new tutorials, insights and quality downloads, trusted by 6500+ readers.

You might also like

Complete Photoshop Editing Workflow: 5 Steps from Raw to Polished

Photoshop offers endless possibilities for photo enhancement, but many photographers never move beyond basic adjustments because the software feels overwhelming. This comprehensive workflow breaks down photo editing into five manageable stages that work consistently across different photography styles. The systematic approach covers everything from initial raw processing to advanced lighting...

Photoshop Workspace Basics: Navigation, Zooming, and Essential Interface Elements

Photoshop's interface can feel overwhelming when you first open the program. Dozens of panels, tools, and menus compete for attention, making simple tasks feel complicated. This tutorial breaks down the essential workspace elements and teaches fundamental navigation skills that form the foundation of efficient Photoshop work. Watch the...

How to Restore Old Damaged Photos Using Nano Banana in Photoshop

Old family photos with scratches, tears, and missing sections can seem beyond repair. Google's Nano Banana AI model, now integrated into Photoshop, makes full restoration possible in minutes rather than hours. This powerful tool excels at maintaining facial characteristics while automatically filling in damaged areas and adding realistic...

How to Get Higher Quality Results from Photoshop's Generative Fill Tool

Photoshop's Generative Fill creates impressive AI extensions, but the results often look blurry and pixelated when viewed at full size. This quality limitation makes many AI-generated areas unusable for printing or large displays. This technique shows how to work around the 1024x1024 pixel quality limit to create much...

How to Use Photoshop's Liquify Tool for Non-Destructive Portrait Retouching

Clothing wrinkles, hair that lacks volume, and awkward fabric bunching can distract from an otherwise great portrait. Photoshop's Liquify tool offers a powerful solution for smoothing out these issues while preserving the natural look of your subject. This tutorial demonstrates how to use the Liquify tool non-destructively with...

You’ve successfully subscribed to Photoshop Roadmap
Welcome back! You’ve successfully signed in.
Great! You’ve successfully signed up.
Success! Your email is updated.
Your link has expired
Success! Check your email for magic link to sign-in.