Halloween brings out the creativity in digital artists, and jack-o-lanterns remain one of the season's most iconic symbols. This comprehensive tutorial transforms an ordinary pumpkin photo into a glowing, carved Halloween masterpiece using advanced layer styles, adjustment layers, and realistic lighting effects.
The technique combines practical carving simulation with atmospheric elements like starry night skies, glowing effects, and environmental details to create a complete Halloween scene.
Watch the Tutorial
Essential Tips for Digital Jack-O-Lantern Creation
These techniques help create more realistic carved pumpkin effects in your Halloween designs.
- Convert your pumpkin image to a smart object before applying filters to maintain non-destructive editing capabilities
- Use brush scattering and size jitter settings to create jagged, organic carving edges instead of smooth geometric shapes
- Apply bevel and emboss effects with custom highlight and shadow colors picked from the pumpkin itself for natural-looking depth
- Create separate layers for the carved opening and inner pulp, then offset them slightly to simulate realistic thickness
- Add radial blur effects to white shapes matching your carved areas to simulate light beams emanating from inside
More Halloween Tutorials
Explore additional spooky design techniques for your seasonal projects.
Create a funny and creepy halloween card in Photoshop
Talented artist, Alexandra Fomicheva from AlfoArt, guides you through the process of creating a humorous and eerie Halloween card in Photoshop.
First, you'll learn how to incorporate a decorative skull into your design. Next, you'll explore the use of skull brushes to add a spooky touch. Then, you'll discover the technique for creating a pumpkin brains effect, adding a gruesome element to your card. Finally, you'll incorporate creepy text to complete the Halloween-themed look.
The tutorial bre

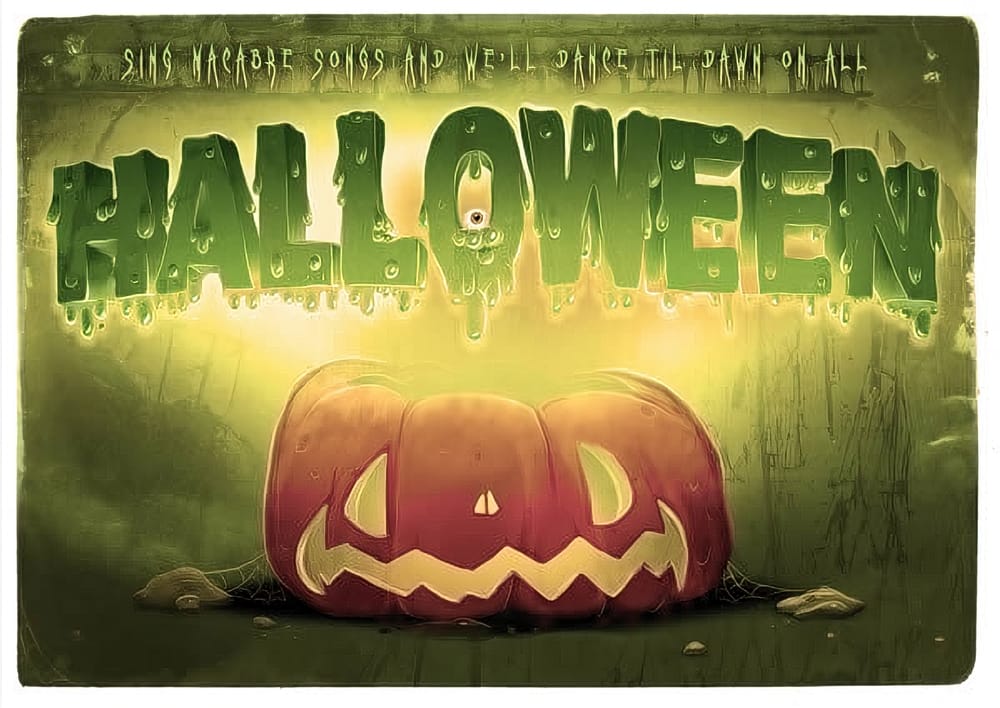
Create a spooky colorful Halloween typography in Photoshop
As autumn rolls in and Halloween nears, many artists start to focus on spooky designs, especially those in the U.S. This tutorial offers a great opportunity to create colorful and eye-catching Halloween typography in Photoshop.
You will learn how to design slimy, gooey, and drippy letters that capture the essence of the holiday. Each step is straightforward, making it accessible whether you're a beginner or an experienced user.
Once you've finished designing your typography, you will have the
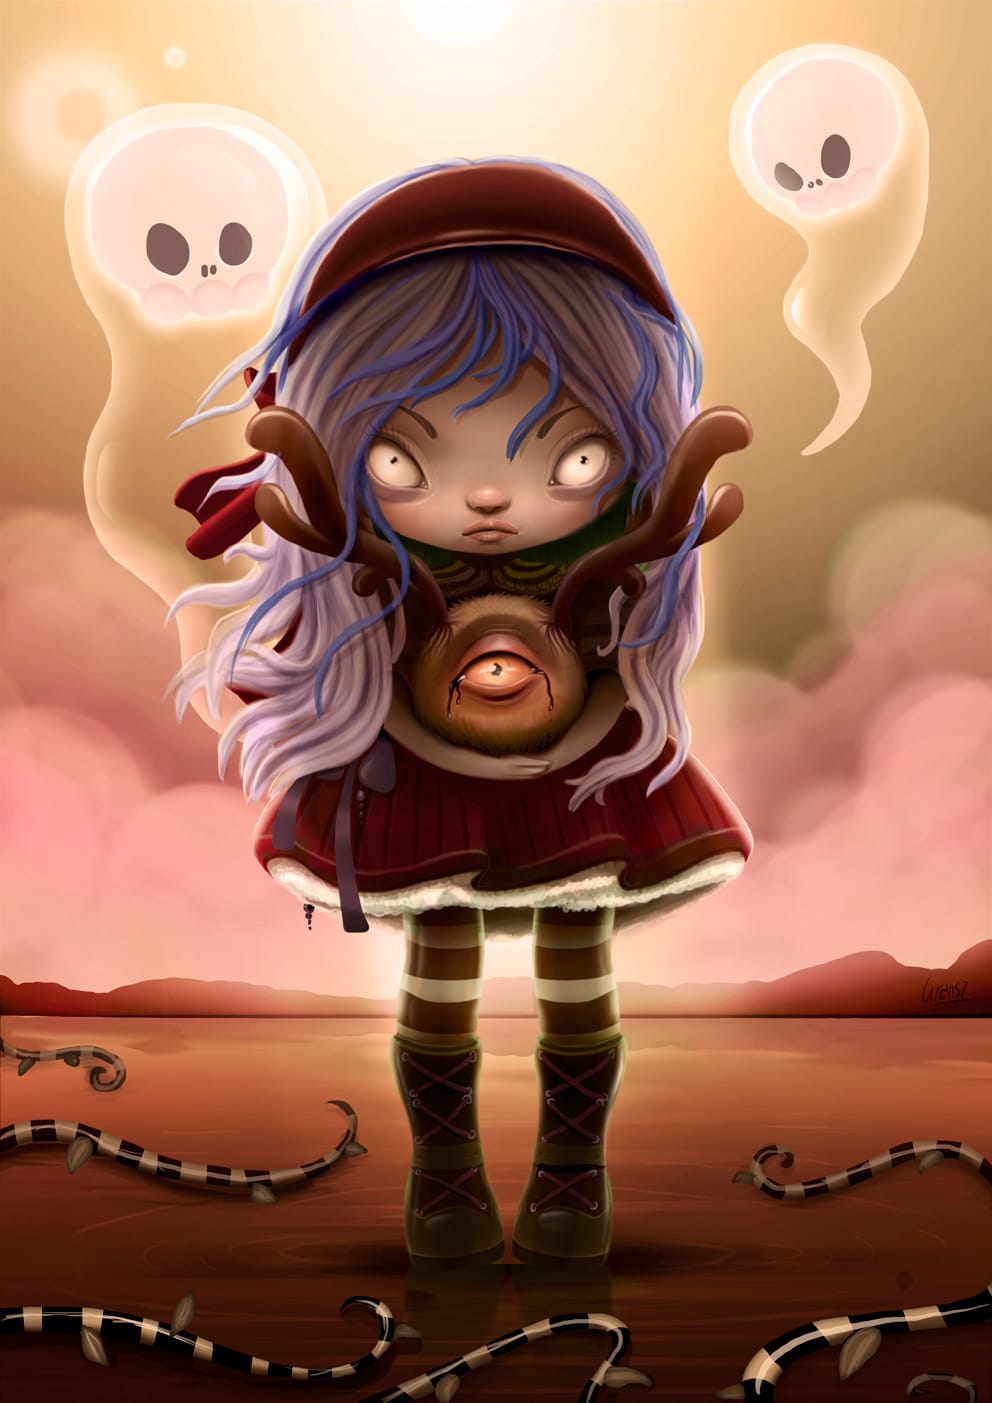
Create a Cute and Scary Children's Illustration in Photoshop
As the fall approaches in many parts of the world, many designers and illustrators might already be thinking about the upcoming Halloween holiday, especially those that are based in the U.S.
In this tutorial, we will show you how to illustrate a cute and scary children's illustration using techniques that you could easily incorporate into your own Halloween artwork.
Watch tutorial
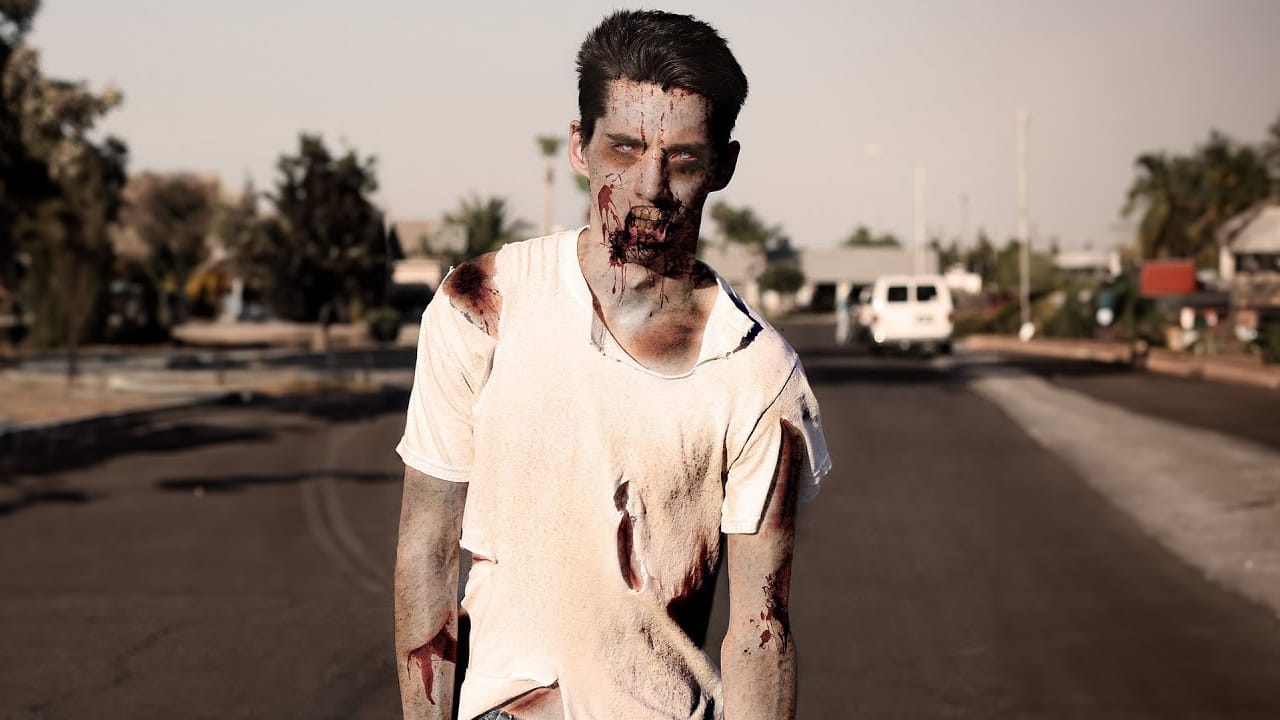
Learn How to Turn Anyone Into a Zombie
In this tutorial by Ch-ch-checkit, you'll discover how to transform anyone into a zombie using Photoshop.
With the current fascination with zombies and apocalyptic themes, this in-depth guide is timely and engaging. You'll need intermediate Photoshop knowledge, including blending modes, masks, and retouching tools, to follow along. You'll learn various techniques to create a convincingly undead look, perfect for adding a touch of horror to your photos.
Whether you're preparing for Halloween or