Create awesome retro halftone effects in Photoshop

Create awesome retro halftone effects in Photoshop

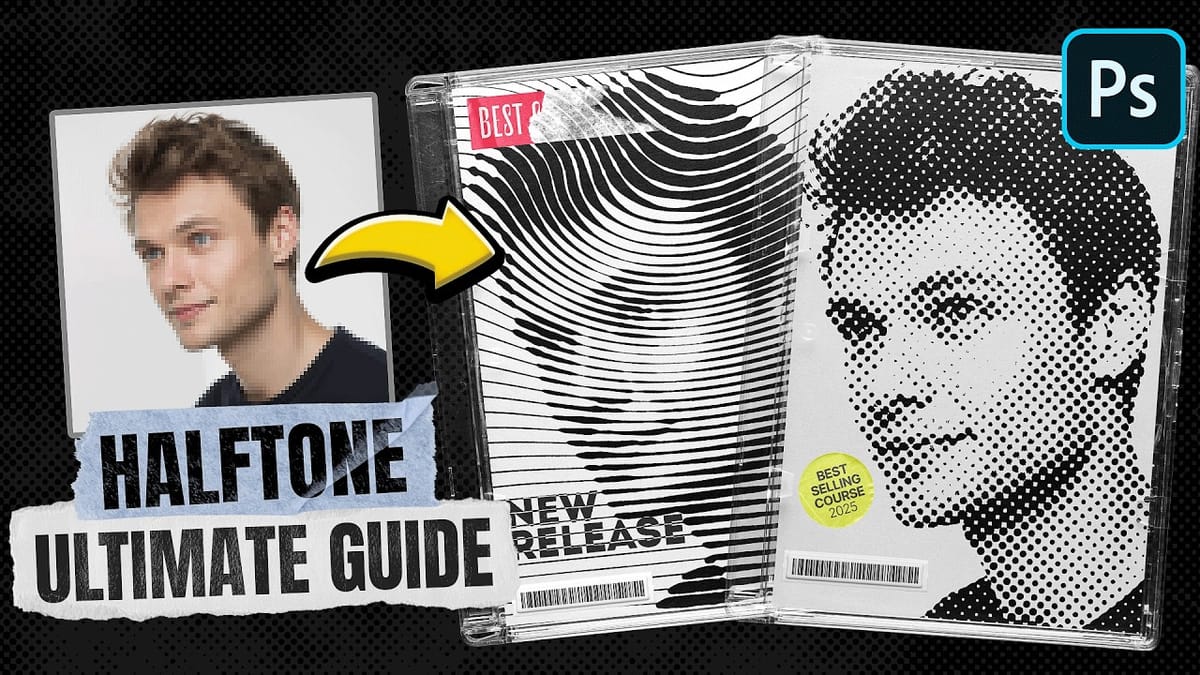
Photoshop includes built-in halftone filters, but they often lack flexibility and can feel rigid for creative projects. Many designers struggle with creating authentic vintage halftone effects that remain editable and can be applied to different image sizes and compositions without starting over.

This tutorial demonstrates a five-layer halftone setup that functions like a live adjustment layer, offering full control over dot size, color, and distressing effects. The system uses seamless patterns and blending modes to create authentic newspaper-style halftones that can be dropped onto any document and customized in real-time.

Watch the Tutorial

Any links or downloads mentioned by the creator are available only on YouTube

Understanding Halftone Pattern Theory

Traditional halftone printing creates the illusion of continuous tone using patterns of dots that vary in size. The technique originated from mechanical printing limitations—presses could only print solid colors, not gradients. By controlling dot density and size, printers could simulate grayscale images and color gradations.

The Hard Mix blending mode becomes crucial in digital halftone recreation because it forces all pixel values to pure black or white, eliminating gray values. This mimics the binary nature of traditional printing where ink is either present or absent. When combined with radial gradient patterns, this creates the characteristic dot structure of authentic halftones.

Modern designers often use halftone effects to evoke newspaper aesthetics, comic book styling, or general vintage appeal. The challenge lies in maintaining editability while achieving authentic results that work across different image types and sizes.

Essential Halftone Layer Techniques

  • Use seamless patterns for scalability: Create halftone dot patterns from small, tileable images (like 50x50 pixels) that repeat cleanly across any document size without visible seams or alignment issues.
  • Combine Hard Mix with reduced fill opacity: Set the dot pattern layer to Hard Mix mode, then lower the fill value to 90% to soften harsh transitions and create more natural dot edges.
  • Layer grunge patterns for authenticity: Add a subtle overlay pattern set to Overlay mode to introduce natural distressing and prevent perfectly uniform dots, enhancing the vintage appearance.
  • Apply slight blur to source images: Convert your base image to a smart object and add 2-3 pixels of Gaussian blur to eliminate fine details that break out of halftone dots, creating cleaner results.
  • Group layers for portability: Organize all five layers into a folder that can be dragged between documents, creating a reusable halftone system that adapts to different image sizes automatically.

Explore additional techniques for creating authentic retro and vintage effects in Photoshop.

Create Authentic Vintage Halftone Effects with Custom Patterns in Photoshop
Photoshop’s built-in Color Halftone filter creates rigid, geometric results that lack the authentic character of vintage print work. The filter also fails to produce true CMYK separations in RGB documents, missing the black channel entirely and creating an unconvincing simulation of traditional printing methods. This technique uses custom patterns and
Create an old-school halftone photo effect in Photoshop – Photoshop Roadmap
Creating authentic vintage halftone effects can be challenging when working with modern digital photography. Many designers struggle to achieve that classic print aesthetic without the result looking artificial or overdone. This tutorial demonstrates a multi-layer approach to building realistic halftone vintage effects using threshold adjustments, pattern overlays, and selective masking.
Ultimate Halftone Effect in Photoshop
Learn how to create stunning halftone effects in Photoshop step by step with this comprehensive tutorial. Whether it’s a classic black-and-white halftone, a vibrant color halftone, or even a smooth gradient halftone, this guide will teach you everything you need to know. You’ll explore how to use the

Get tutorials & freebies delivered to you.

Subscribe to the Photoshop Roadmap newsletter, a weekly roundup of new tutorials, insights and quality downloads, trusted by 6500+ readers.

You might also like

Complete Photoshop Editing Workflow: 5 Steps from Raw to Polished

Photoshop offers endless possibilities for photo enhancement, but many photographers never move beyond basic adjustments because the software feels overwhelming. This comprehensive workflow breaks down photo editing into five manageable stages that work consistently across different photography styles. The systematic approach covers everything from initial raw processing to advanced lighting...

Photoshop Workspace Basics: Navigation, Zooming, and Essential Interface Elements

Photoshop's interface can feel overwhelming when you first open the program. Dozens of panels, tools, and menus compete for attention, making simple tasks feel complicated. This tutorial breaks down the essential workspace elements and teaches fundamental navigation skills that form the foundation of efficient Photoshop work. Watch the...

How to Restore Old Damaged Photos Using Nano Banana in Photoshop

Old family photos with scratches, tears, and missing sections can seem beyond repair. Google's Nano Banana AI model, now integrated into Photoshop, makes full restoration possible in minutes rather than hours. This powerful tool excels at maintaining facial characteristics while automatically filling in damaged areas and adding realistic...

How to Get Higher Quality Results from Photoshop's Generative Fill Tool

Photoshop's Generative Fill creates impressive AI extensions, but the results often look blurry and pixelated when viewed at full size. This quality limitation makes many AI-generated areas unusable for printing or large displays. This technique shows how to work around the 1024x1024 pixel quality limit to create much...

How to Use Photoshop's Liquify Tool for Non-Destructive Portrait Retouching

Clothing wrinkles, hair that lacks volume, and awkward fabric bunching can distract from an otherwise great portrait. Photoshop's Liquify tool offers a powerful solution for smoothing out these issues while preserving the natural look of your subject. This tutorial demonstrates how to use the Liquify tool non-destructively with...

You’ve successfully subscribed to Photoshop Roadmap
Welcome back! You’ve successfully signed in.
Great! You’ve successfully signed up.
Success! Your email is updated.
Your link has expired
Success! Check your email for magic link to sign-in.