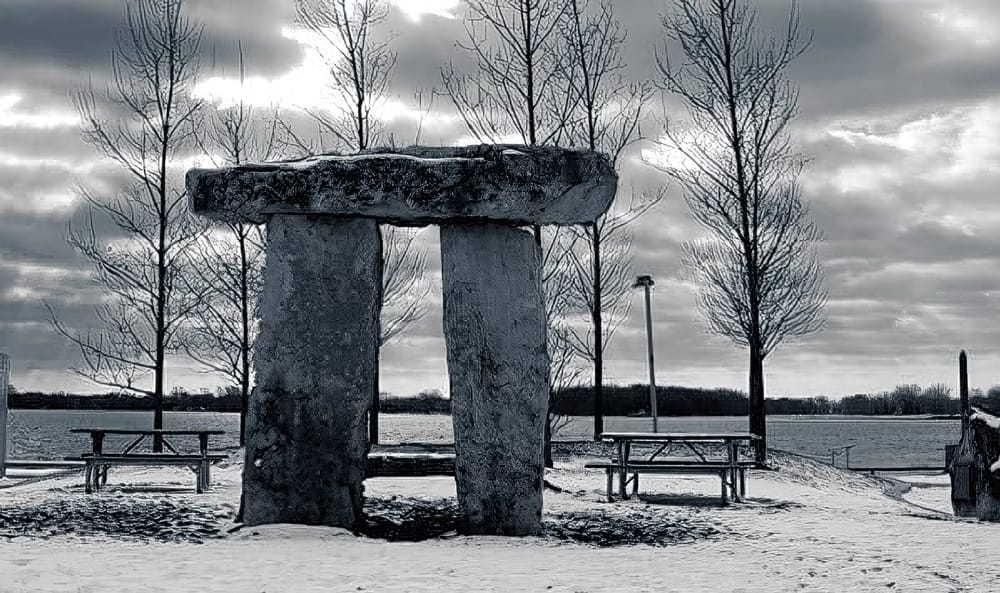
Learn to create a realistic carved stone or concrete text effect in Photoshop without complex 3D tools. This tutorial guides you through simulating depth and adding texture, achieving a dramatic, chiseled look.
Watch the Video
Practical Tips for Carved Stone Text Effects
Achieve a convincing stone or concrete text effect by implementing these core Photoshop techniques:
- Roughen Edges with Masks: Create a solid black layer with a mask, then apply *Filter Gallery* effects like Spatter and Stamp, followed by *Crystallize*, to generate chipped, irregular text edges.
- Simulate Damaged Areas: Duplicate your text layer, apply the *Crystallize* filter for large, fractured shapes, then use *Outer Bevel* from Bevel & Emboss with the layer's Fill Opacity set to 0% to only show the effect.
- Build Extruded Sides: Duplicate the main text layer, scale it slightly, and manually paint in any explicitly missing areas to create the illusion of faux 3D extrusion. Apply a subtle *Gaussian Blur* to its mask for a softer blend.
- Craft Dramatic Cast Shadows: Utilize the *Path Blur* filter with the "Rear Sync Flash" setting on a blurred duplicate of your text layer. Adjust the path and speed to create directional, realistic cast shadows that enhance depth.
- Add Subtle Light Bounce: Repeat the *Path Blur* technique, but reverse the direction, invert the layer, set the blend mode to Color Dodge, and reduce the Fill Opacity to create a soft, upward bounce of light.
More Tutorials about Text Effects
Explore additional techniques for enhancing text in Photoshop with these related tutorials.
Create a Stone and Concrete 3D Text Effect in Photoshop
This tutorial guides you through the process of creating a striking stone and concrete 3D text effect using Photoshop. By combining Photoshop’s 3D tools with Filter Forge, you can achieve a unique and impressive look for your text.
You will start by setting up your canvas and entering the text you want to manipulate. Next, you will explore the 3D features in Photoshop to give your text depth and perspective. Afterward, incorporating Filter Forge allows you to apply textures that simulate the ru

Beautiful Warmtone and Cooltone Photo Effects Photoshop Tutorial
Back in the day, when one would print their own black and white prints, you had a choice of a zillion different papers. They basically boiled down to cooltone and warmtone papers. This combined with different developers gave one an array of tones to choose from for any given picture. Sadly, nowadays it’s getting harder to find specific papers and certain developers are no longer being manufactured. In the digital era, most people who might not have gone through the trouble of trying different to
Colorful Painted 3D Text Effect Tutorial in Photoshop
In this tutorial by Angelo Konofaos, you'll explore how to create a 3D-style text effect in Photoshop, alongside techniques like adding shadows, highlights, shines, and colors.
Utilizing a variety of Photoshop tools such as the Mixer Brush, Pen Tool, clipping masks, and adjustment layers, the tutorial demonstrates the process of refining text to achieve a polished and dimensional look.
For optimal results, Konofaos recommends using a pen tablet like the Wacom Intuos to enhance precision and fl
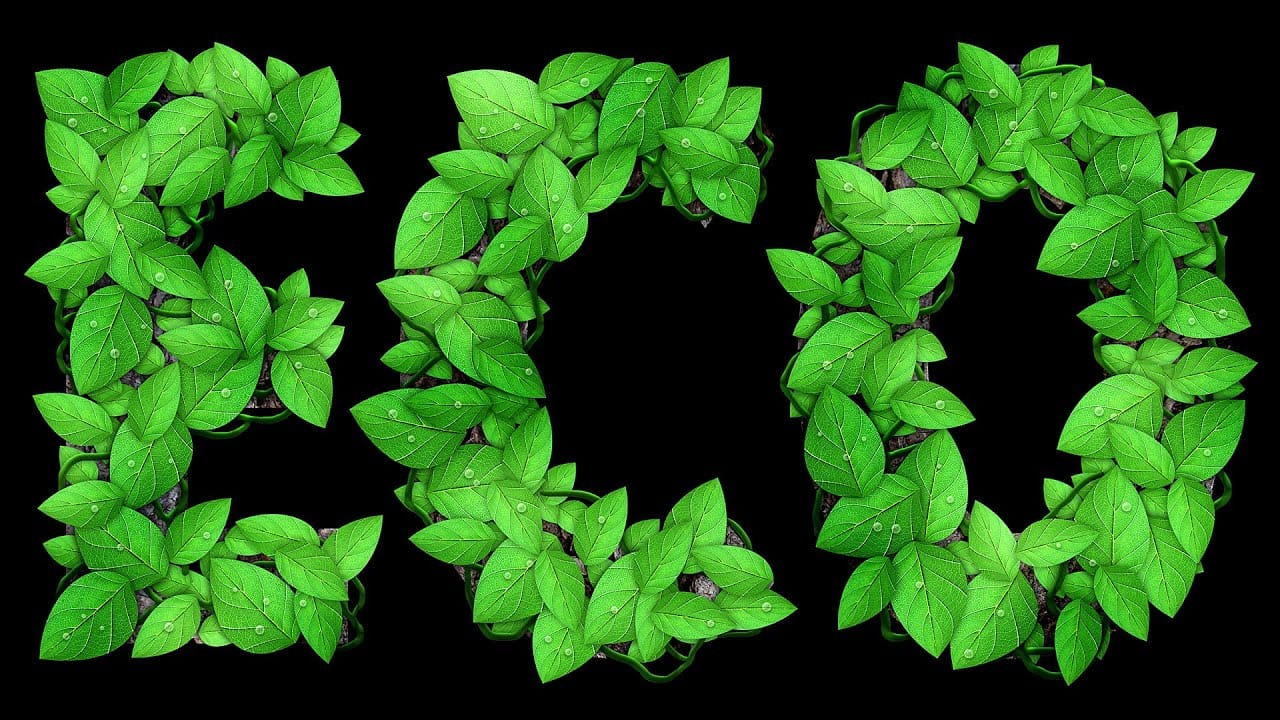
Leafy Text Effect Photoshop Tutorial
In this tutorial by Spoon Graphics, you'll learn how to create a text covered with leaves in Adobe Photoshop.
The tutorial guides you through the process of designing text made up of tiny leaves, vines, and water droplets. While the tools and techniques used are straightforward, the tutorial emphasizes the importance of patience in achieving a complex and detailed final result.
The outcome is a stunning and intricate piece of eco-themed artwork that showcases the beauty of nature.
Watch tutor