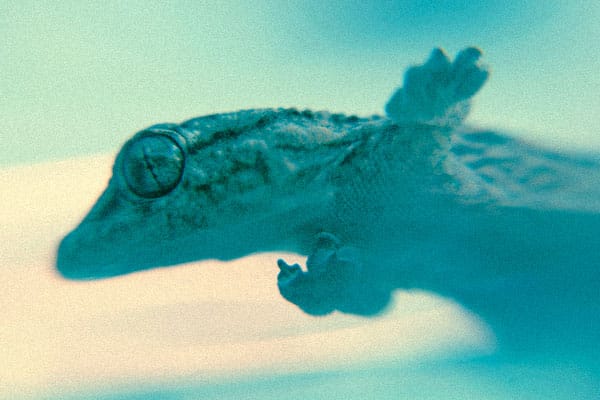
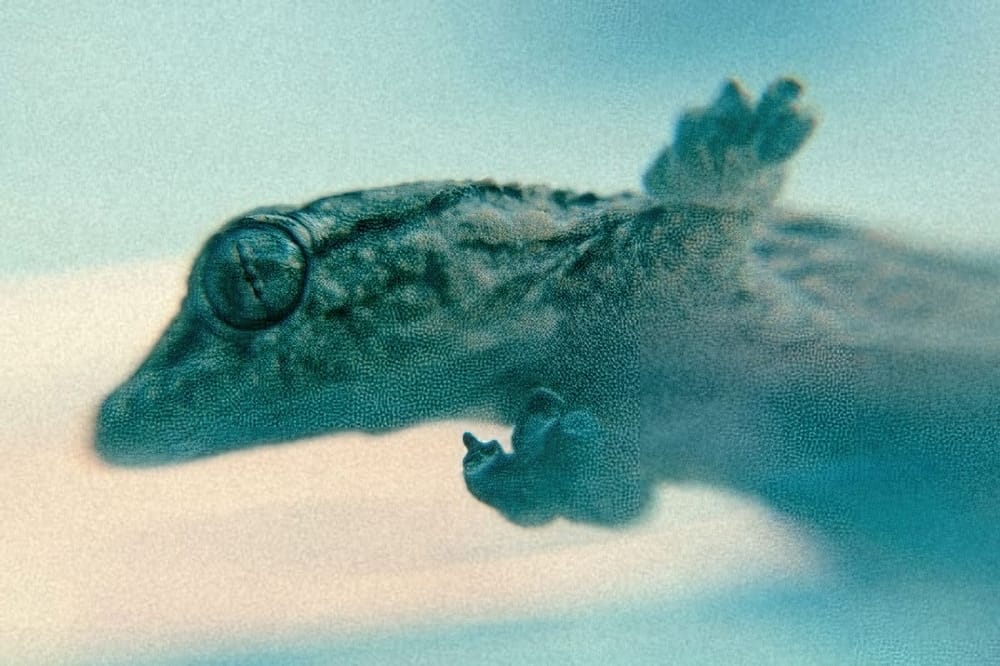
X-pro (short for cross-processing) is basically developing your film in the wrong chemicals. If you are shooting color negative film you develop it with E6 (chemicals for slide film) and you will get slides. If you´re shooting slide film, you develop it with C-41 (chemicals for color negative film) and you´ll get negatives. Depending on the film you use and the lab you use to develop, you´ll get completely different results. Great results depend on accurate exposure, experience through experimenting with a variety of films and a ton of luck! In this tutorial I´ll show you how to get interesting results using Photoshop with one of the most complicated processes: developing color negative film in E6 without the hassle of having to scan the resulting slides on to your PC.
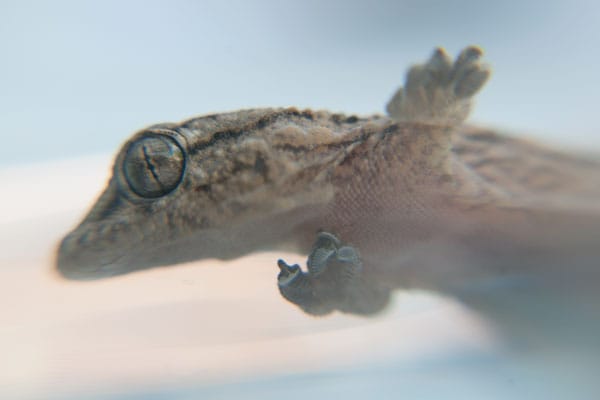
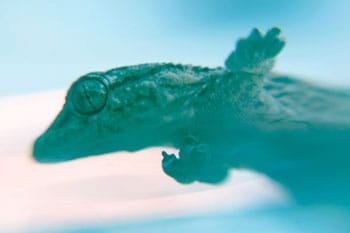
Before we begin, bear in mind that not all images look great in X-pro. For this particular process you will lose a bit of contrast. Midtones will look a bit “murky” and highlights will warm up the image. Sometimes you might want to try using the opacity to recover some of the original colors for a more subtle effect. For this example I chose a macro shot of a lizard since the natural color and lighting was not to my liking. This gave it an interesting edge. Let´s get started!
To start off, we´re going to select our curves adjustment by clicking on the “new layer adjustment” icon at the bottom of your Layers Palette.

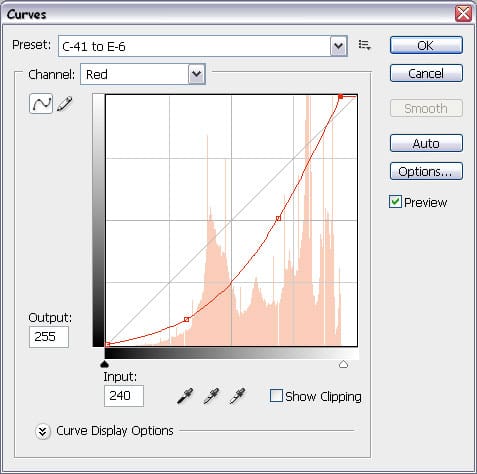
What you want to do with the red channel is get rid of most the red in the midtones and at the same time keep some warmth in your highlights by sliding the white triangle to the left or by simply adding 240 to the input field (keep in mind you have to have the top keypoint selected for the input field to appear!). This will bring out the blues and greens.
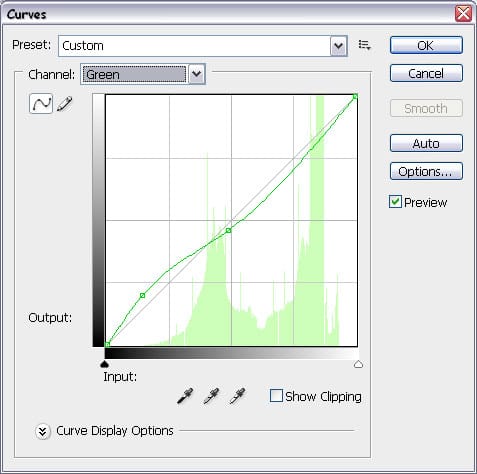
Next one up is the green channel. With this channel we want to bring some green to the midtones and add some blue to the highlights. Try not to go overboard on this one. Just a simple S curve will do.
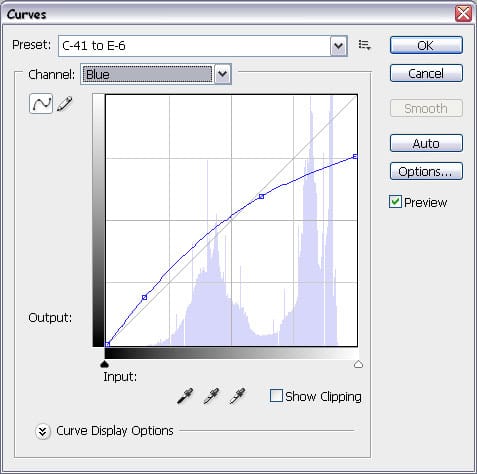
Finally in the blue channel what we want to achieve is that characteristic aqua green of the C-41 to E6 X-pro process. To do this we simply have to add a bit of blue to our midtones and eliminate a lot of blue from our highlights. This will through some green into the mix.
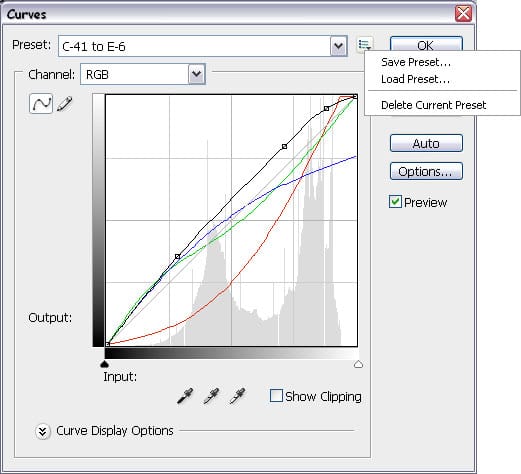
Your final RGB channel should look something like this. Remember you can always go back and tweak this adjustment for a specific image. One last really cool thing you can do with this curves adjustment is save it as a preset. That way you can select it from you curve adjustments presets without having to go through the process again.
To do this, click on the preset options icon

located at the top of your curves adjustment window. Save the preset and you should now be able to select it from the preset menu in your curves adjustment window whenever you want to use it!
One of the things I hate about X-pro is the insane grain you get from mixing the wrong chemicals with film but if you´re one of those who like to keep it real then you can go ahead and add some grain to the final image. To do this first we need to merge your background image with your curves adjustment layer. The shortcut for doing this quickly is simply pressing Shift + CTRL + Alt + E. Turn that fresh new layer into a smart object by going to Filters > Convert for Smart Filters. Next, open your filter gallery and select Film Grain from the Artistic folder.
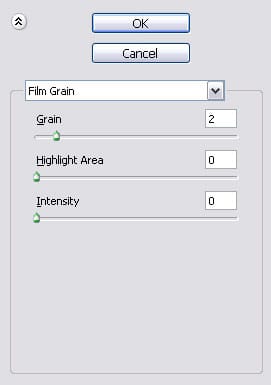
You don´t have a whole lot of options here. Add a bit of grain but not too much as it will really just start looking like a pattern more than film grain. Don´t play with the intensity slider as it will most likely just blow your highlights clear off.
Since it is a smart filter you can go back and edit your filter adjustments. You can also simply lower the opacity on this filter to dail some of that grain back to make it look more natural and subtle.
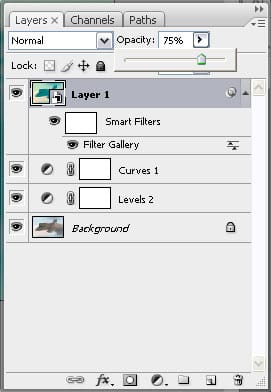
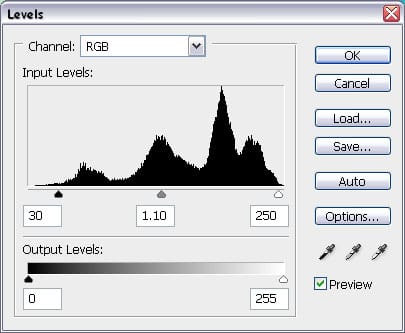
To finish this particular image off I added some contrast using Levels from the Layer adjustments palette. This will saturate the colors a bit more and really make the image pop.
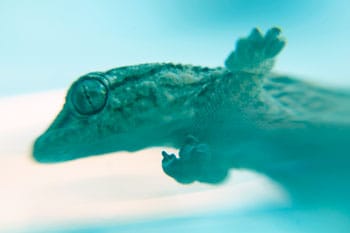
That about does it for this tutorial.If you want to check out what my Curve Adjustment Preset look like you can download it Here. Here´s the before and after image plus one in between (set to 50% opacity) for a more subtle effect.
Original Image

50% Opacity
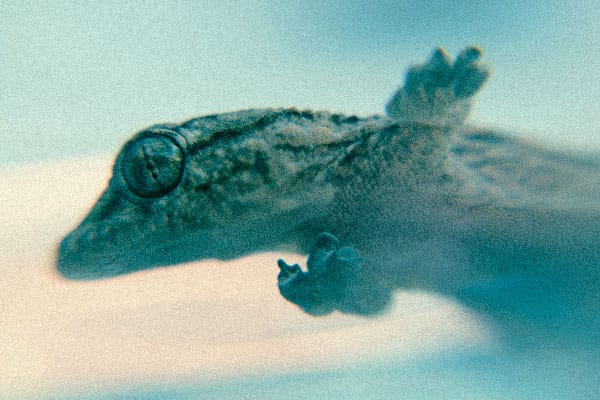
Final Image
