7 Photo Mistakes You Can Easily Fix in Photoshop

7 Photo Mistakes You Can Easily Fix in Photoshop

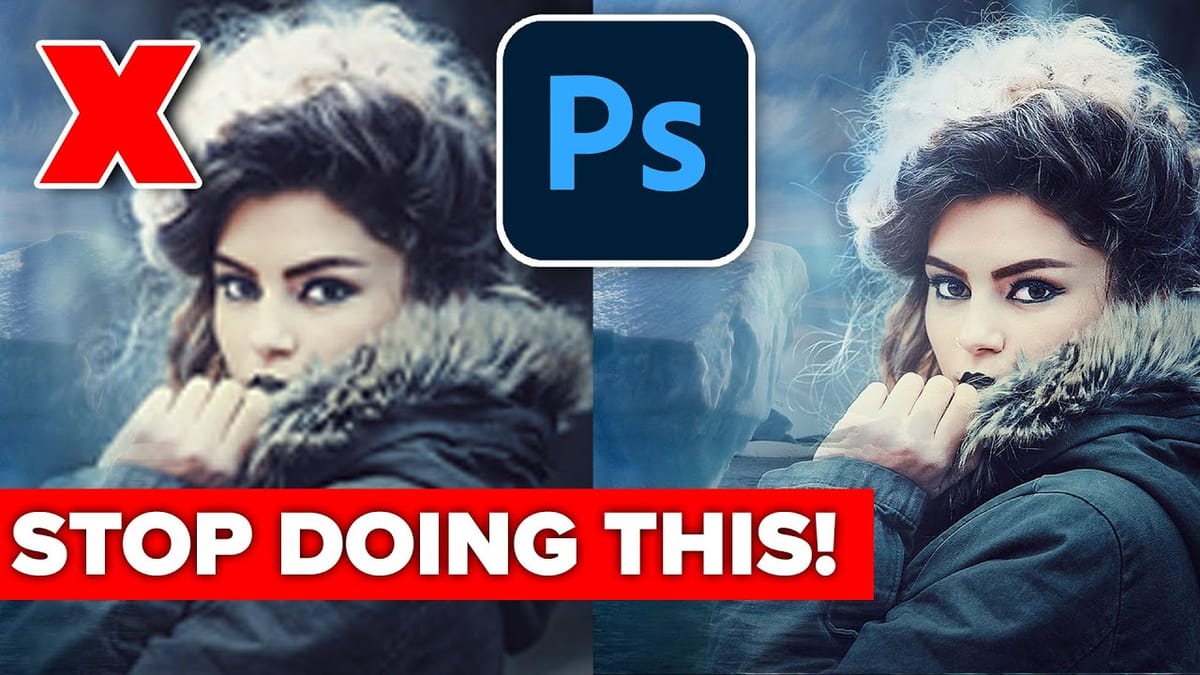
Even experienced photographers struggle with certain technical challenges that can ruin an otherwise perfect shot. Motion blur from camera shake, missed focus on key subjects, overexposed highlights, or unwanted color casts are frustrating problems that happen to everyone—and sometimes they're impossible to avoid in-camera.

This comprehensive tutorial demonstrates seven essential Photoshop techniques for rescuing imperfect photos. From advanced sharpening methods to selective color correction, these workflows will help transform problematic images into professional results and expand your post-processing toolkit.

Watch the Tutorial

Any links or downloads mentioned by the creator are available only on YouTube

Understanding Photo Correction Fundamentals

Photo correction in Photoshop relies on understanding the underlying cause of each problem. Motion blur requires directional analysis, while missed focus benefits from edge detection algorithms. Exposure issues demand careful highlight and shadow recovery, while color problems need targeted hue and saturation adjustments.

The key to professional results lies in using Smart Filters and adjustment layers whenever possible. These non-destructive techniques preserve your original image data and allow for precise refinements later. Many corrections also benefit from selective masking, applying fixes only where needed rather than globally.

Modern AI-powered tools like Topaz Photo AI can often deliver superior results for complex problems like severe motion blur, but Photoshop's built-in tools remain highly effective for most common issues and offer greater creative control.

Essential Photo Repair Techniques

  • Use Filter > Sharpen > Smart Sharpen with motion blur removal for camera shake, adjusting the angle to match the blur direction and fine-tuning the radius to avoid halo artifacts
  • Apply targeted sharpening with negative masks to fix missed focus selectively—sharpen soft areas like eyes while protecting already-sharp elements like hair or clothing
  • Recover blown highlights using Camera Raw Filter with reduced highlights and auto-adjusted whites for natural-looking detail restoration
  • Fix color casts with Hue/Saturation adjustment layers, using the hand tool to target specific color ranges and adjusting the selection sliders for precise control
  • Remove sweat patches and skin discoloration by selecting the problem area, then using targeted lightness and saturation adjustments combined with the Remove Tool for edge cleanup

Explore More Photoshop Tutorials

These related tutorials cover additional photo correction and enhancement techniques:

10 Critical Photoshop Mistakes You Must Stop Making
We all love to laugh at other people’s mistakes, especially while looking at those hilarious Photoshop Fails. But when are you going to fix your own mistakes? Even those so-called experts make mistakes sometimes. So, before you call yourself a Photoshop master, see if you make any of these amateur mistakes when using Photoshop. 1) […] More
Avoid the 3 worst Photoshop photo editing mistakes
How to avoid the biggest Photoshop photo editing mistakes that make you look like a noob. More
5 tips to make your photos better in Photoshop
How to make your photos look better fast in Photoshop. 5 Tips to make all your photos look better in Photoshop. This Photoshop tutorial shows you 5 things you should do to make your photos look better than ever. More
21 Photoshop Tips – From Basic to Advanced!
This tutorial by TextureLabs covers a wide range of Photoshop tips and tricks aimed at enhancing your editing skills, regardless of your experience level. You will find various techniques that cater to different needs, from creating cleaner cutouts to understanding filter applications. The content begins with an introduction and moves

Get tutorials & freebies delivered to you.

Subscribe to the Photoshop Roadmap newsletter, a weekly roundup of new tutorials, insights and quality downloads, trusted by 6500+ readers.

You might also like

How to Create Textured Portrait Collages in Photoshop

Portrait collages open up creative possibilities that go far beyond traditional photo editing. By combining artistic filters, color manipulation, and texture mapping, you can transform ordinary portraits into striking visual compositions that blend photography with graphic design elements. This technique breaks down complex imagery into simplified color zones, then maps...

Time-Blending Photography: Combine Photos from Different Times of Day

Empty streets and dark buildings can ruin an otherwise perfect sunset shot. Time-blending photography solves this problem by combining the best elements from different times of day — the vibrant sky from golden hour with the dynamic light trails from nighttime traffic. This technique transforms static daytime or sunset scenes into...

Understanding White Balance in Photoshop: Temperature vs Tint Explained

White balance confusion ends here. Temperature and tint work differently to fix color casts, and knowing when to use each tool transforms how you correct photos. Photoshop's new Color and Vibrance adjustment layer finally brings these essential controls natively into the workspace, eliminating the need to jump into...

How to Remove Reflections and Glare from Glasses in Photoshop Using AI

Eyeglass glare can ruin an otherwise perfect portrait, obscuring the subject's eyes with bright reflections. Photoshop's AI tools now offer powerful solutions for removing even the most stubborn reflections while preserving natural eye details. This tutorial demonstrates proven techniques using multiple AI models and strategic masking...

How to Use Photoshop Curves Auto Options for Color Grading

Professional color grading transforms ordinary images into visually striking compositions with rich depth and atmosphere. Hidden curves auto options in Photoshop let you assign custom colors to shadows, midtones, and highlights for dramatic enhancement. This technique goes beyond basic adjustments to create cinematic looks that bring images to life with...

How to Remove Dark Eye Circles Using Frequency Separation in Photoshop

Dark under-eye circles can make portrait subjects look tired or unhealthy, even when they're not. Traditional brightening methods often create unnatural results or destroy important skin texture. This tutorial demonstrates frequency separation, a professional retouching technique that removes dark circles while preserving natural skin texture and realistic lighting...

You’ve successfully subscribed to Photoshop Roadmap
Welcome back! You’ve successfully signed in.
Great! You’ve successfully signed up.
Success! Your email is updated.
Your link has expired
Success! Check your email for magic link to sign-in.