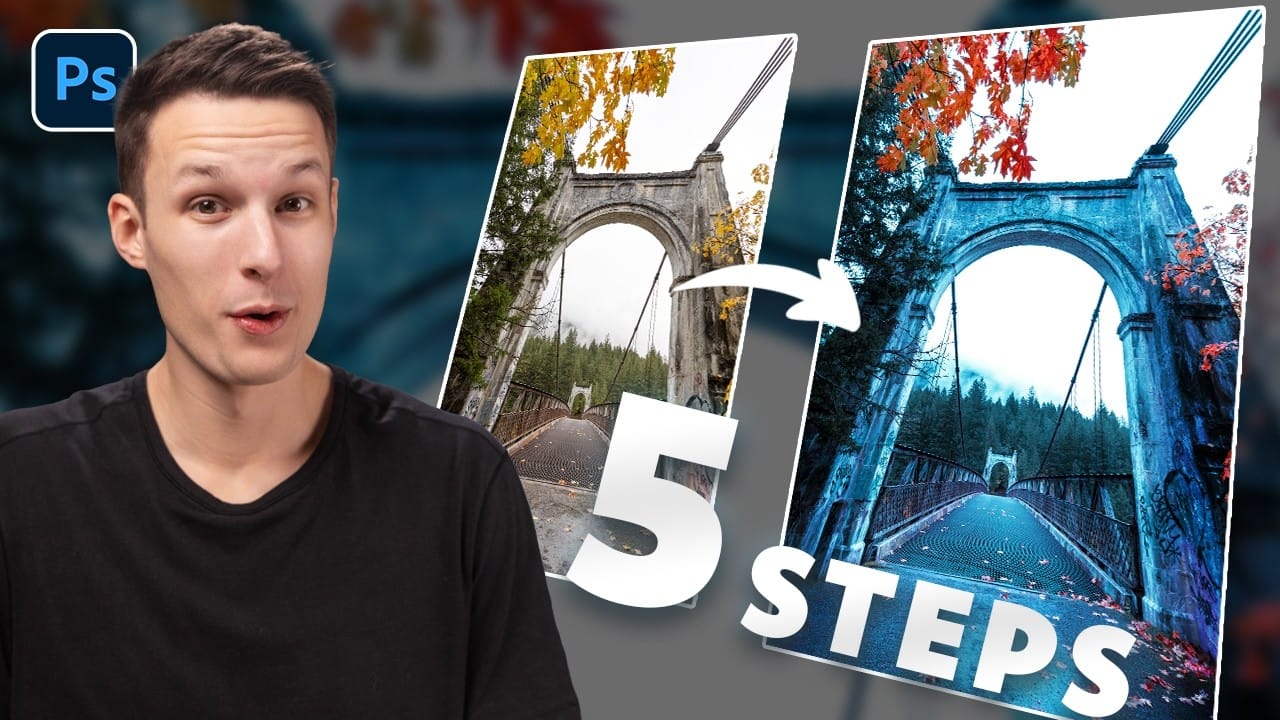
Many photographers and designers seek to infuse their images with vibrant, true-to-life colors that truly stand out. Achieving this level of color enhancement often requires more than basic adjustments; it demands a nuanced approach that breathes life into every detail.
This tutorial uncovers three powerful, yet often overlooked, Photoshop techniques to elevate your color grading. Discover how to apply subtle, realistic color changes, sculpt specific color moods, and selectively refine tones within your photos.
Watch the Full Tutorial Here
Beyond Basic Adjustments: Mastering Color Fidelity
Photoshop offers a vast array of tools for color adjustment, but true mastery lies in understanding how to apply these tools with precision and realism. Moving past standard sliders, advanced techniques ensure that color enhancements integrate naturally into an image rather than appearing as an artificial overlay. By leveraging detailed masks and selective targeting, artists can achieve nuanced color shifts that maintain image integrity while significantly boosting visual impact. This approach allows for a transformative yet authentic color grading process, bringing depth and emotion to digital art.
Key concepts explored include:
- Using layer masks with the
Apply Imagefunction for realistic blending. - Sculpting specific color moods with Gradient Maps and
Blend If. - Precisely targeting colors and luminance values with
Range Masksin Camera Raw. - Avoiding unnatural color casts by integrating adjustments seamlessly.
- Achieving greater control over how color effects interact with image tones.
Practical Tips for Enhancing Colors
- Apply Color Balance or Selective Color adjustments with an
Apply Imagelayer mask for natural color blending. This ensures colors interact realistically with the underlying image exposures. - Utilize
Gradient MapswithOverlayorSoft Lightblending modes to introduce specific color vibes, such as warm summer tones or cool atmospheric effects. - Refine
Gradient Mapadjustments by employing the Blend If feature in Layer Styles to control which exposure ranges are affected. HoldAlt/Optionwhile dragging sliders to feather the effect smoothly. - Convert your layer to a Smart Object before entering Camera Raw Filter to maintain non-destructive editing for selective adjustments.
- Use
Range Maskswithin Camera Raw's selective adjustment tools (e.g., Radial Filter) to precisely target specific colors or luminance values. This enables localized color and exposure correction without complex manual masking.
More Tutorials about Color Enhancement in Photoshop
Explore additional resources to deepen your understanding of color theory and advanced editing techniques in Photoshop.